This is the first part of my series on problem preparation for a programming contest. In this part, we are going to familiarize ourselves with Polygon -- a modern platform for this purpose in a professional way! There are already a few posts on this topic, but for the completeness of the series, it would be nice to include this part.
This post is long, because I wanted to explain things thoroughly. Feel free to skip some parts if you already know about it.
Why Polygon?
To prepare a problem, we must at least prepare the following things:
- The problem statement.
- The tests. For this, we must also prepare:
- A solution.
- A test generator.
- A checker, if the answer is not unique.
Obviously, a platform is not a requirement to prepare a problem. A problem statement can just be in plain text format. A solution, a generator and a checker are also just programs, which can be written with any tools. But there are a lot of problems during the preparation. Here are some examples:
- How do we know of a test is valid? That is, how to know if a test satisfies the constraints given in the problem statement? This is hard for a human to inspect by eye since a test will often be way too big.
- How can we guarantee that the solution is correct? How do we test the solution if there is no tests beforehand?
- How do we manage the tests? How do we add or remove a test? What if the generating algorithm changed?
Polygon is a solution to these problems, as well as some other problems . It aids the problem's author during the problem preparation process with automation. Of course, using Polygon requires some additional efforts. Because of that, I hope to overcome the learning process with this post.
The example problem
To demonstrate the usage of Polygon, we need to prepare a problem ourselves. The problem that we are going to take a look is Codeforces 1442A - Extreme Subtraction. The problem statement is quite short, so let's repeat it once more time here.
We are given an array of length . We can use the following operation as many times as we want: select any integer () and either:
- decrease (the first elements) by .
- decrease (the last elements) by .
We must answer, for a given array , if it is possible to make all the elements of the array equal to zero by applying a certain number of operations.
And because this blog is about test generation, we also need to take a look at the IO format, as well as the constraints.
Input
The first line contains one positive integer () -- the number of test cases. Each of the test cases is described as follows.
The first line of the test case contains one integer () -- the number of elements in the array.
The second line of the test case contains integers ().
The sum of over all test cases does not exceed .
Output
For each test case, print YES if it is possible to make all elements of the array equal to zero by applying a certain number of operations, and NO otherwise.
Example
4
3
1 2 1
5
11 7 9 6 8
5
1 3 1 3 1
4
5 2 1 10
4
3
1 2 1
5
11 7 9 6 8
5
1 3 1 3 1
4
5 2 1 10YES
YES
NO
YESYES
YES
NO
YESWhy this problem?
The problem is very simple. Its difficulty is average, therefore I think it is not too hard to follow. The input is also one of the classic kinds of input: an array. Array generation is simple, but in some cases, is not easy. In part 2 and 3 we are going to take a deeper look at it, also with this problem.
Let's create a problem
When entering Polygon, we are greeted with a simple page like this.

On the head bar (the bar with blue color), there are several options. Polygon allows us to manage individual problems, as well as group them into one contest. In this post, our focus is on creating a problem, so let's click the New problem option.
A new page appeared and ask us to enter the problem name. Let's go with extreme-subtraction-clone.
After entering the name, we are directed to the page with a list of problems. In this list, there are problems owned by us. There are also problems that are shared with us, meaning the problem's owner grant us the access to it. That's why there are already some problems like example-a-plus-b in that page.

In the row having our problem, under the column Working Copy we click Start to start working with it.
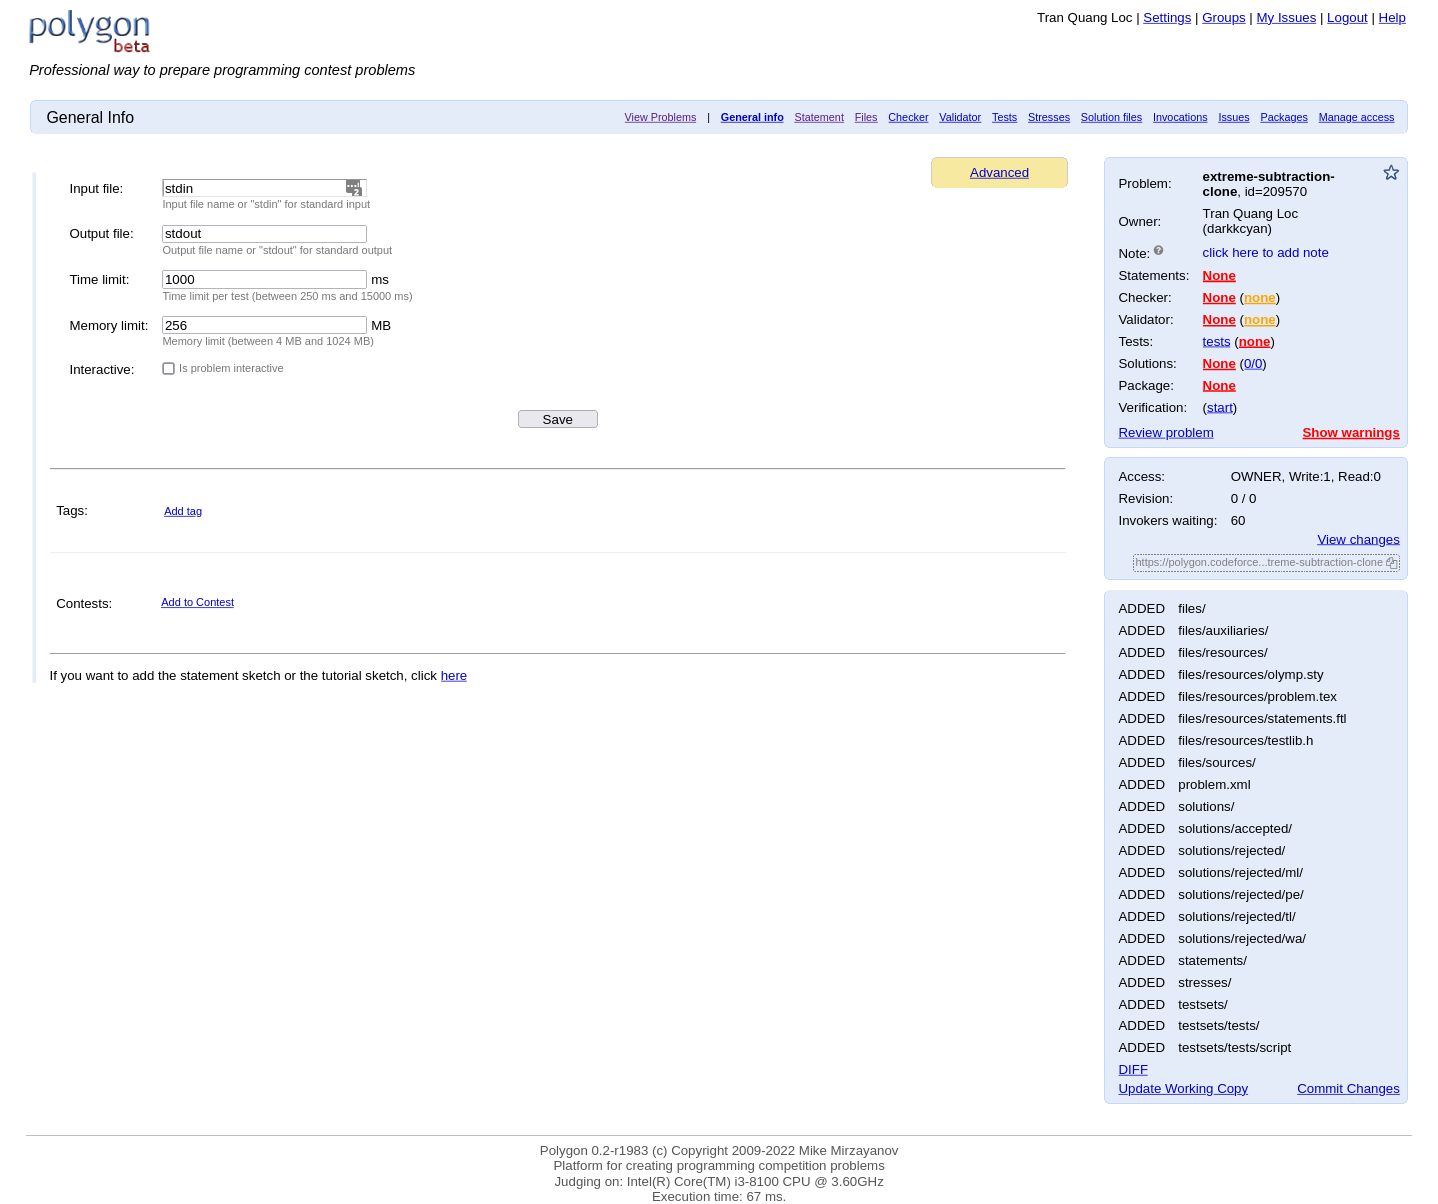
Problem general info page
“A user interface is like a joke. If you have to explain it, it’s not that good”. — Martin Leblanc
The above is the General Info page of our problem. I'm not saying that the page is bad. In fact, the page is very detailed, so detailed that it was a bit shock for me when I first created a problem. I think the page is good, but it is not a beginner-friendly page. There are a lot of information to digest, so I think it worth explaining a few things first.
How Polygon manages things
Folder structure
If you were trying to prepare problem locally, what would you do? You could write the statement and store it into a file. You could write solutions and they will also be files. When there are lots of files, you can divide the files into sub folders: a folder for statement(s), a folder for the solutions, a folder for the test generators,...
Polygon also works with folder structure. Everything on Polygon has its own predefined structure. That is, the statement, the solutions, the generators,... that you put on Polygon will go to its respective folder. One advantage of Polygon is that The author only need to work with the user interface, and Polygon will take care the rest. For most of the time, this structure is not visible to us, and we don't need to. But there are a way to do see it, and we go through it later.
Version control
Working with code, we often want to keep track the changes. Imagine when you add a feature, but it turns out to be buggy, then what you want is to revert back to the previous version of your code. Broadly speaking, this process is called version control. One way to do version control is to copy your entire folder into a new one and making changes there, but that is not very efficient. This problem can be solve more efficiently with a version control system like git, which is the most popular one for programming and software development.
For Polygon, you don't need to know git. Polygon is also a version control system, but with simpler functionality. It can help us keep track the changes, allow us to commit the changes, and revert back to one previously committed version.
INFO
Committing is an action to make your changes permanent to the version control system. That is, the version control system will create a new version with your changes. If you did not commit, then your changes is still temporary.
Our first commit
Now we can go back to the General Info page to see one detail there. Here is we wanted to see.
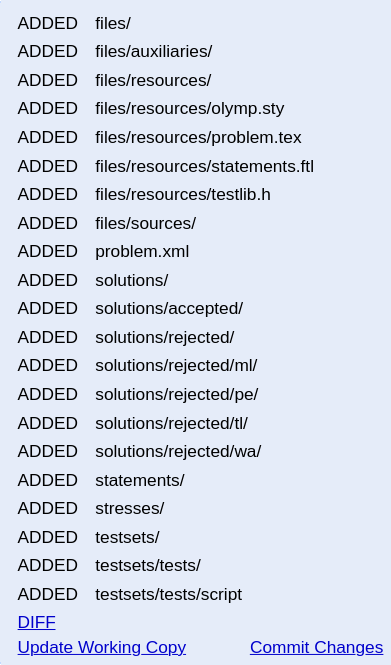
This is the last panel of the right column. Every lines in this panel starts with ADDED, and that means all the files and folders shown in this panel are newly added, which make sense since we just create a problem.
If you clicked DIFF (for differences), a page will appear, showing which file has the changes, compared to the previous version. Again, this is a new problem, so all the files here are newly generated and added by Polygon.
The option Update Working Copy is for team-working (yes, another advantage of Polygon). Suppose that if you are in a version behind the newest version, made by your colleague, you can click that. Your version will then be updated to be the latest version. All of your uncommitted changes will be merge by Polygon. If there is conflict (when your changes might not be the same as your colleague), Polygon will ask you to merge them by yourself, for each conflicted file. For now we should not care about this option much because we are not working in team.
Now, let's click Commit Changes. By doing a commit, we mark the our first version of the problem. After that we are presented with a page, asking us to enter a message for a commit. This is also a feature of a typical version control system. A version is a record of the development history, and can also be treated as a diary or a journal. A commit message is short, but it should explain what has been changed during a version, so the message should be meaningful. Even though on Polygon, you can leave it blank, but it is a good practice to always write a message.
There were not much going on during this first commit. So one popular commit message is Initial commit.
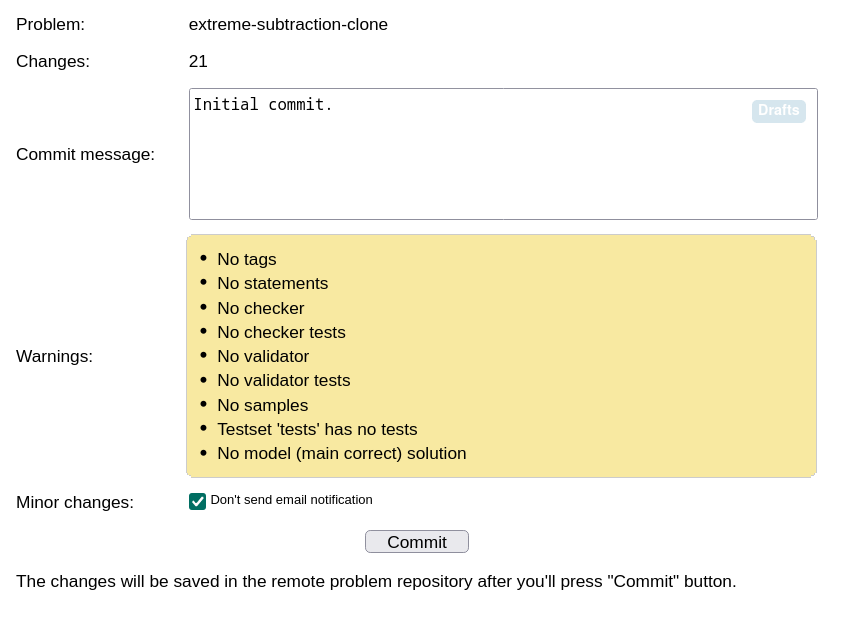
There is also a check box for not sending an email notification. If leaved unchecked, an email with full DIFF will be sent to your email, as well as this problem developer. This might be useful when for team-working , but for one person, I usually mark it. Be aware that this mail can also be filtered with a spam filter.
After making the commit, the changes are gone, because there is no changes in the current compared to the previous yet.
INFO
If you did not commit, your temporary changes won't be visible to your colleague.
Why making a commit now?
As you can see, we have not done anything with this problem. It is fine to add something first, like the statement, and then do a commit. But I have saw people using Polygon making a commit after a lot of changes. That is not a good practice. It is better to make small commits, with meaningful messages. That way, the versions are easier to maintain.
Keep committing regularly.
The other user interface parts
There are two more significant UI parts that we should care about: the head bar and the first panel of the right column.

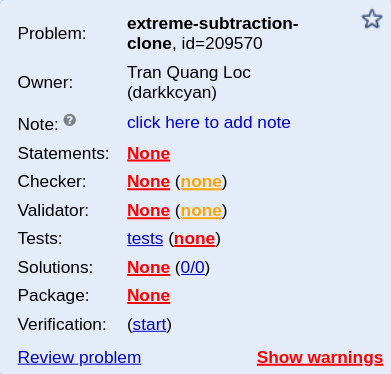
These two UI parts share some options. For example, the option Statement in the head bar also lead to the same page as clicking the word None near the option Statements of the panel. The difference is that, the top bar will contains the link to all of the pages of a problem, while the panel shows only some link. But the panel shows more information about the problem, like the number of tests and the number of solutions. There is nothing now so everywhere are None or 0.
There is also the second panel of the right column, but for this tutorial, it does not contain much information, except for the last part.
To see these two UI parts in details, let's move on the following part.
Adding the problem statement
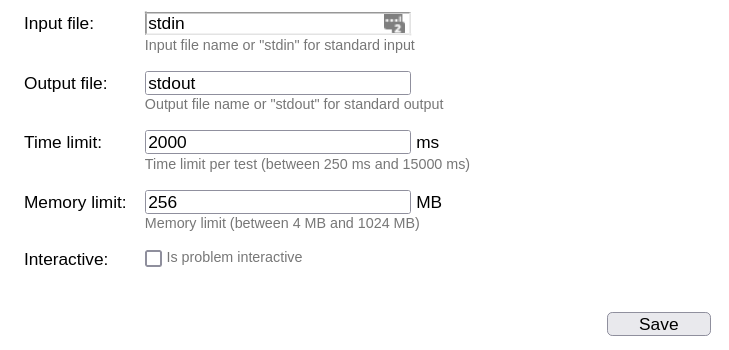
Before adding the problem statement, notice that in the General Info page, there are also input boxes for the input/output files, the time and memory limits. In the original problem, the time limit is 2s, and the rest are the same, so we should now change the time to 2000ms. Remember to press Save.
The statement page
By clicking the Statement option in the head bar, a page asking us to choose the language for statement will appear. We can choose English and put the original problem statement. Polygon asks us to choose the language because it can manage the problem statements in various languages, making it suitable for prepare problems for competition on an international scale.
After choosing the language, the following page appears.
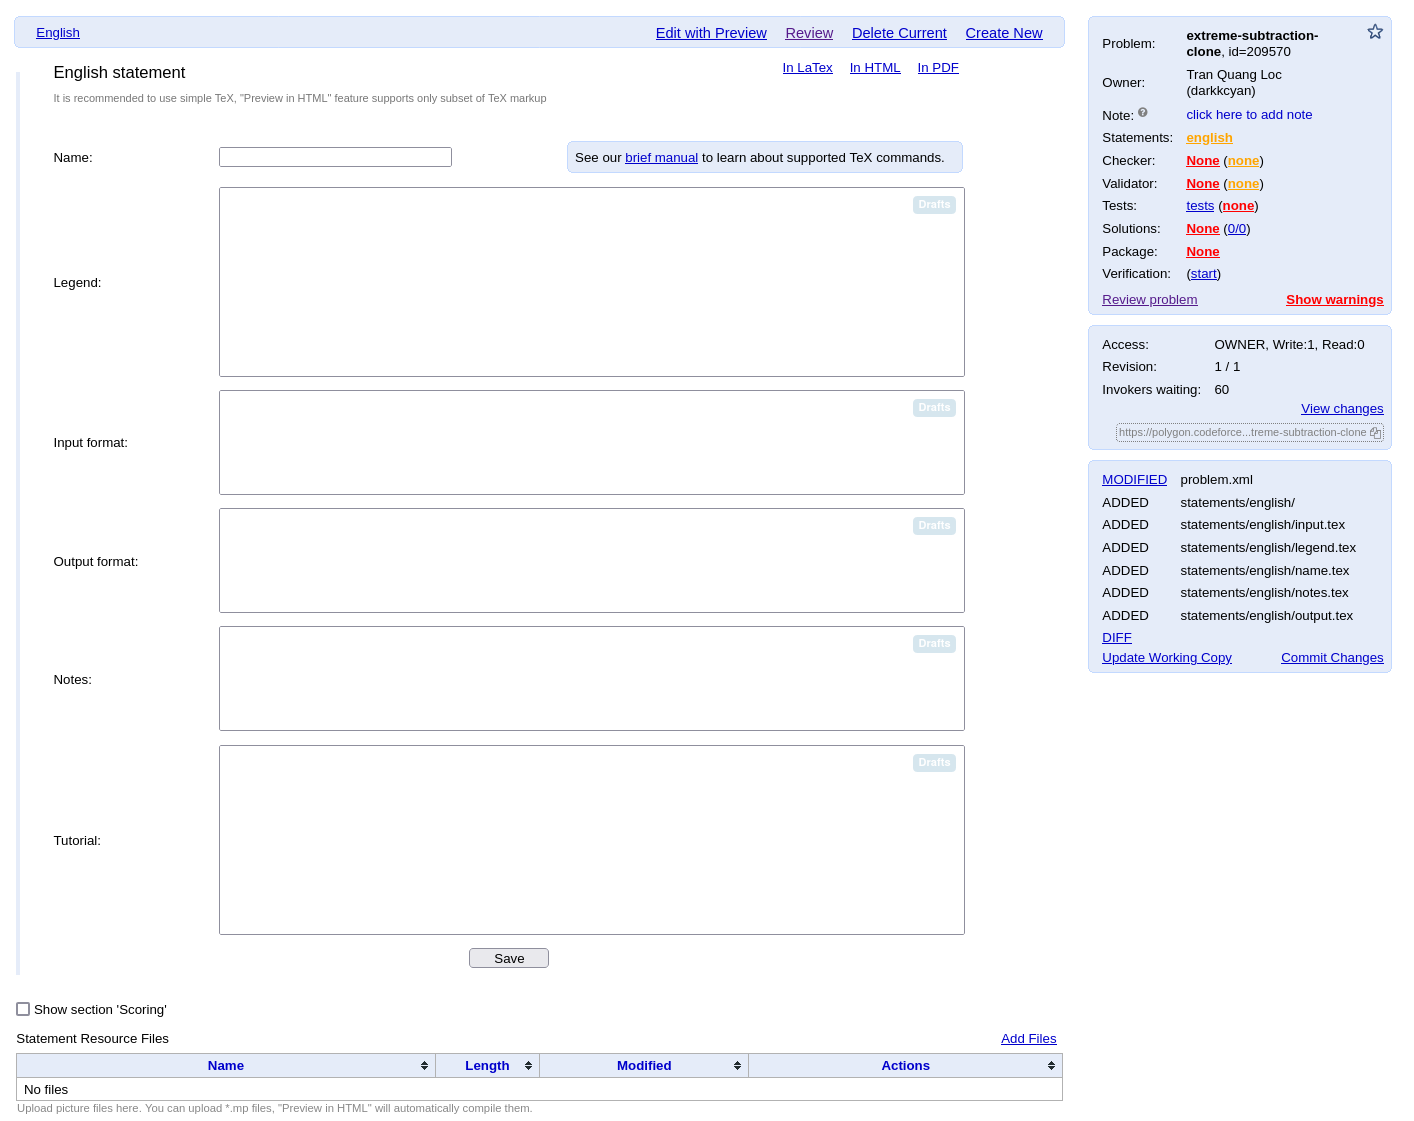
First of all, if you look at the last panel of the right column again, there are new files added by Polygon. The content of these newly added files can be edited in this page.
In the center, there are several boxes for creating parts of the statement. The parts are clear, so I think no explanation is needed for each of them. But they are divided by parts instead of only one big text for easier management. Polygon supports both web format and PDF format for problem statement. By dividing the statement into parts, Polygon can put the parts into the corresponding position in the position for each format.
If you wanted to add images to your problem, you can add the image at the bottom of this page at the Statement Resource Files, and then include it in your statement.
There are also some options at the top. Edit with preview will split your screen by two, showing your texts on one side, and your beautiful, formatted statement on the other side. With split view, it is easier to see what you are typing and what it will look like.
The Review option is for reviewing the some parts of the problem in one screen, namely the statement, the validator and the checker. More on that later.
The Delete Current is for deleting this statement, and Create New is for creating new statement in another language.
TeX
To write the statement, Polygon supports -- a markup language that has a lot of options for document formatting. The coolest thing that makes stands out is its math mode for writing mathematical formula, making a great language for writing statement. Another reason for supporting is for generating PDF version of the statement.
On Polygon, For the PDF format, you can use any commands you like. But since is not a language for the web, Polygon only supports minimal set of commands for the web format.
If you don't know , Polygon also includes a small manual right in the statement page, so do check it out. The syntax of is also simple: it is plain text, but if you need some special formatting, you can use command with the syntax \commandName{Texts}.
Beside the minimal set of commands, Polygon supports extensive math mode using MathJax. For writing a formula inside a paragraph, use the $formula$ (inline style) syntax, and for writing a formula in an individual paragraph, use the $$formula$$ (display style) syntax. For example writing $\sum \frac{1}{n}$ will result the formula inside this paragraph, while $$\sum \frac{1}{n}$$ will result
There are a lot of commands, but again, you don't need to be an expert in to learn them. You can see a list of commands for math mode in this wiki page.
Writing the statement
First, the name of the problem can be Extreme Subtraction Clone, because we are cloning that problem.
The followings are part of the legend, the input format and the output format:
You are given an array $a$ of $n$ positive integers. You can use the following operation as many times as you like: select any integer $1 \le k \le n$ and do one of two things:
\begin{itemize}
\item decrement by one $k$ of the first elements of the array.
\item decrement by one $k$ of the last elements of the array.
\end{itemize}

For example, if $n=5$ and $a=[3,2,2,1,4]$, then you can apply one of the following operations to it (not all possible options are listed below):

\begin{itemize}
\item decrement from the first two elements of the array. After this operation $a=[2,1,2,1,4]$;
\item decrement from the last three elements of the array. After this operation $a=[3,2,1,0,3]$;
\item decrement from the first five elements of the array. After this operation $a=[2,1,1,0,3]$;
\end{itemize}

Determine if it is possible to make all the elements of the array equal to zero by applying a certain number of operations.
You are given an array $a$ of $n$ positive integers. You can use the following operation as many times as you like: select any integer $1 \le k \le n$ and do one of two things:
\begin{itemize}
\item decrement by one $k$ of the first elements of the array.
\item decrement by one $k$ of the last elements of the array.
\end{itemize}
For example, if $n=5$ and $a=[3,2,2,1,4]$, then you can apply one of the following operations to it (not all possible options are listed below):
\begin{itemize}
\item decrement from the first two elements of the array. After this operation $a=[2,1,2,1,4]$;
\item decrement from the last three elements of the array. After this operation $a=[3,2,1,0,3]$;
\item decrement from the first five elements of the array. After this operation $a=[2,1,1,0,3]$;
\end{itemize}
Determine if it is possible to make all the elements of the array equal to zero by applying a certain number of operations.The first line contains one positive integer $t$ ($1 \le t \le 30000$) --- the number of test cases. Then $t$ test cases follow.
Each test case begins with a line containing one integer $n$ ($1 \le n \le 30000$) --- the number of elements in the array.
The second line of each test case contains $n$ integers $a_1, a_2, \ldots, a_n$ ($1 \le a_i \le 10^6$).
The sum of $n$ over all test cases does not exceed $30000$.The first line contains one positive integer $t$ ($1 \le t \le 30000$) --- the number of test cases. Then $t$ test cases follow.
Each test case begins with a line containing one integer $n$ ($1 \le n \le 30000$) --- the number of elements in the array.
The second line of each test case contains $n$ integers $a_1, a_2, \ldots, a_n$ ($1 \le a_i \le 10^6$).
The sum of $n$ over all test cases does not exceed $30000$.For each test case, output on a separate line:
\begin{itemize}
\item \t{YES}, if it is possible to make all elements of the array equal to zero by applying a certain number of operations.
\item \t{NO}, otherwise.
\end{itemize}
The letters in the words \t{YES} and \t{NO} can be outputed in any case.For each test case, output on a separate line:
\begin{itemize}
\item \t{YES}, if it is possible to make all elements of the array equal to zero by applying a certain number of operations.
\item \t{NO}, otherwise.
\end{itemize}
The letters in the words \t{YES} and \t{NO} can be outputed in any case.There is no example explanation in the original statement, but let's try to write one:
In the first case, the given array $a$ is $[1, 2, 1]$. We can do the following operations:
\begin{enumerate}
\item decrement from the \bf{first} two elements of the array. After this operation $a = [0, 1, 1]$.
\item decrement from the \bf{last} two elements of the array. After this operation $a = [0, 0, 0]$.
\end{enumerate}
Therefore, the answer is \t{YES}.
In the first case, the given array $a$ is $[1, 2, 1]$. We can do the following operations:
\begin{enumerate}
\item decrement from the \bf{first} two elements of the array. After this operation $a = [0, 1, 1]$.
\item decrement from the \bf{last} two elements of the array. After this operation $a = [0, 0, 0]$.
\end{enumerate}
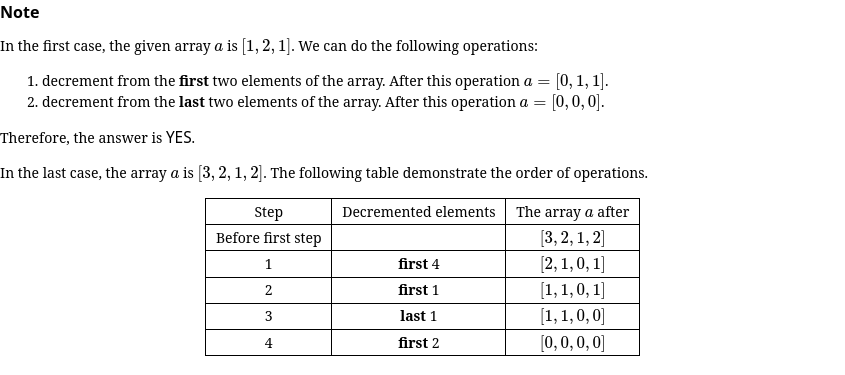
Therefore, the answer is \t{YES}.This test case is simple. For more complicated cases, I recommend using table or images. So now let's add this case to the example: . Here is what the explanation for this case might look like using table:
In the last case, the array $a$ is $[3, 2, 1, 2]$. The following table demonstrate the order of operations.

% Hello there. This is a line comment in TeX!
% You don't need to align the & symbols as I do. They are just for readability.

\begin{center}
\begin{tabular}{|c|c|c|}
\hline
Step & Decremented elements & The array $a$ after \\ \hline
Before first step & & $[3, 2, 1, 2]$ \\ \hline
1 & \bf{first} 4 & $[2, 1, 0, 1]$ \\ \hline
2 & \bf{first} 1 & $[1, 1, 0, 1]$ \\ \hline
3 & \bf{last} 1 & $[1, 1, 0, 0]$ \\ \hline
4 & \bf{first} 2 & $[0, 0, 0, 0]$ \\ \hline
\end{tabular}
\end{center}
In the last case, the array $a$ is $[3, 2, 1, 2]$. The following table demonstrate the order of operations.
% Hello there. This is a line comment in TeX!
% You don't need to align the & symbols as I do. They are just for readability.
\begin{center}
\begin{tabular}{|c|c|c|}
\hline
Step & Decremented elements & The array $a$ after \\ \hline
Before first step & & $[3, 2, 1, 2]$ \\ \hline
1 & \bf{first} 4 & $[2, 1, 0, 1]$ \\ \hline
2 & \bf{first} 1 & $[1, 1, 0, 1]$ \\ \hline
3 & \bf{last} 1 & $[1, 1, 0, 0]$ \\ \hline
4 & \bf{first} 2 & $[0, 0, 0, 0]$ \\ \hline
\end{tabular}
\end{center}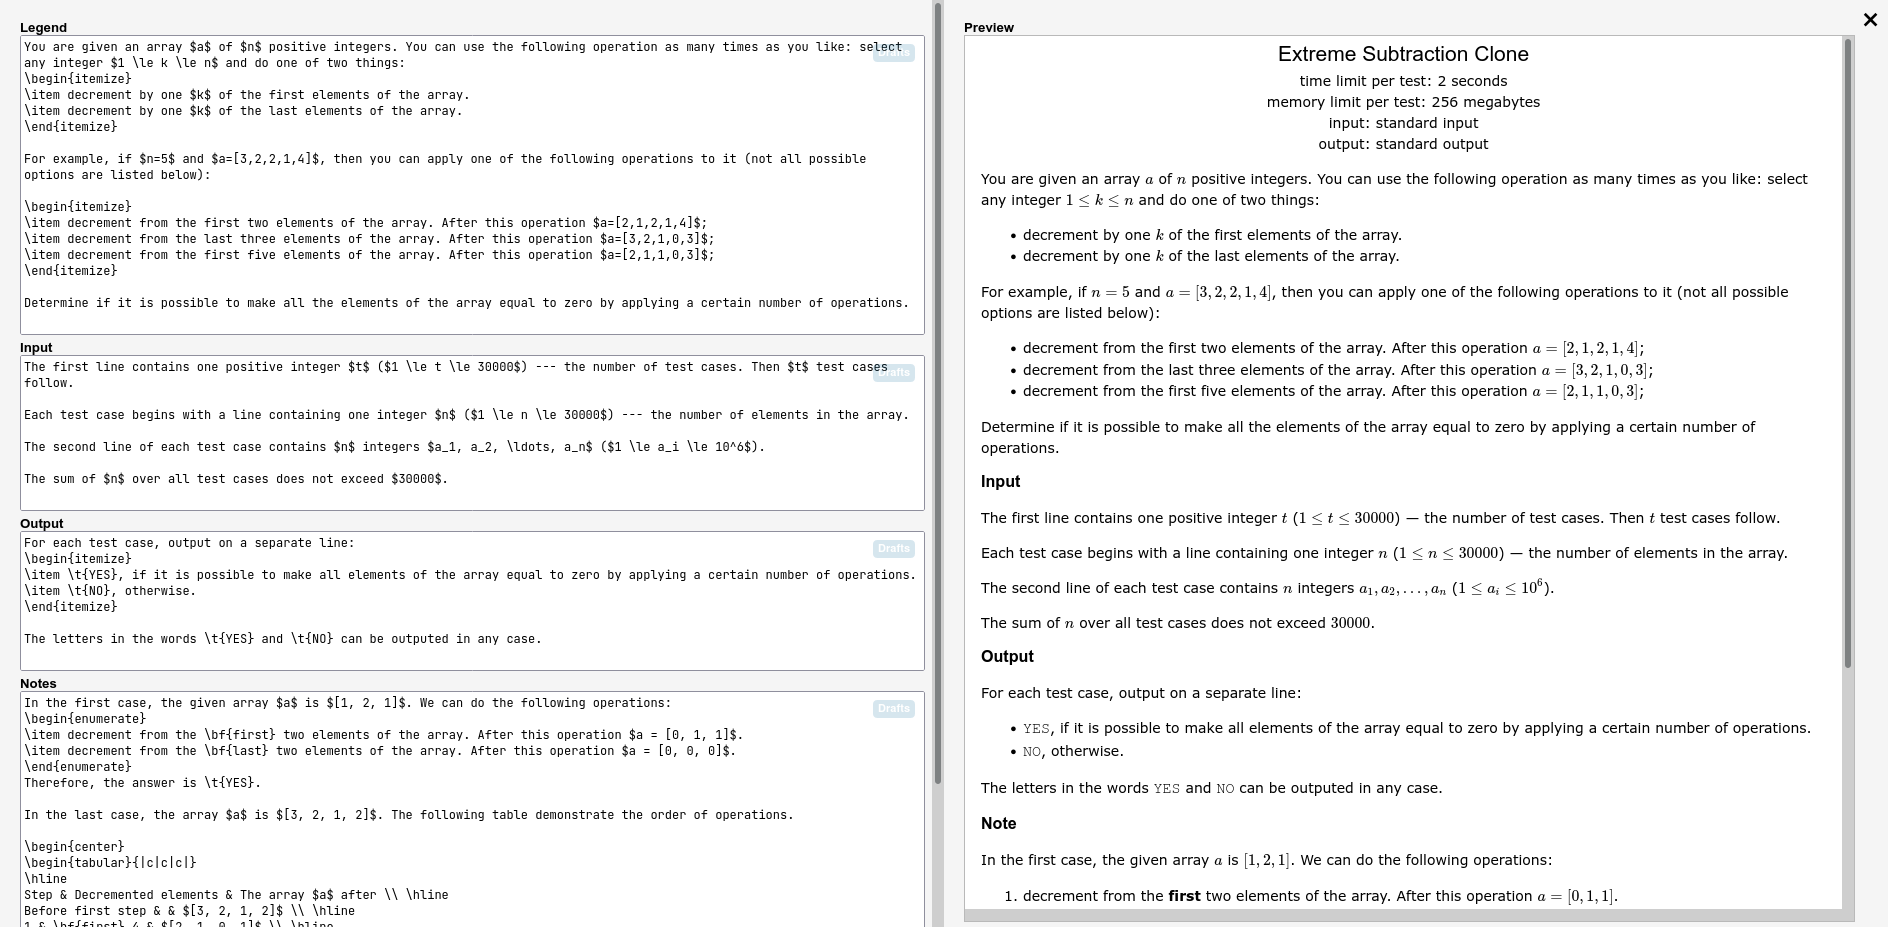
You can see that there is no Example tests here. That is because the Example tests must also be added in the Tests section, not this section. That way, it will be ensure its correctness, because when you change the input, Polygon will validate it again, and generate a new output for it.
After typing the statement, go back to the statement page by clicking the x icon at the top right, and remember to click Save.
I'm not adding the Tutorial here, because it is not the main focus. But you can do it by yourself as a little exercise. Polygon also supports making tutorial in web format and PDF format, as well as in various languages.
Our second commit
I think it is not redundant to remind about the importance of the commit. Here we have added the problem statement, which is a complete work. Making a commit now is a reasonable action. The commit message for this version can be something like Add problem statement.
But I want to add the examples now!
I usually wait until the validator and the model solution ready to add the example tests. That way, only the input data of the example tests need to be entered. Polygon will validate the example test, as well as generate the output for us.
Lucky for us, Polygon also allows to add example tests with custom output. If you wanted add the example right now, I will briefly temporary demonstrate it here (without making a commit). Later I will re-add the examples again but without custom output, because it's the law I think it is better to let the Polygon generate the outputs. But adding it here is also good, since it can be used to check to Notes in the statement. Just remember to replace the custom output with the generated output.
Before continuing, here is the test.
5
3
1 2 1
5
11 7 9 6 8
5
1 3 1 3 1
4
5 2 1 10
4
3 2 1 2
5
3
1 2 1
5
11 7 9 6 8
5
1 3 1 3 1
4
5 2 1 10
4
3 2 1 2YES
YES
NO
YES
YESYES
YES
NO
YES
YESNow, go to the Create tests page, by clicking the options Tests on the top bar. On this page, click Add tests.
For more details on this page, see Adding the tests.
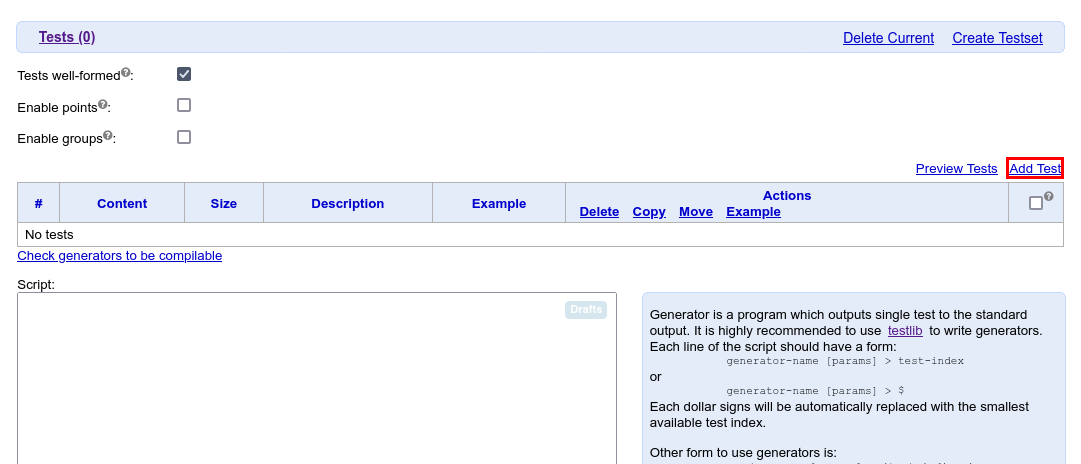
Add Tests linkAfter that, the following page will appear.
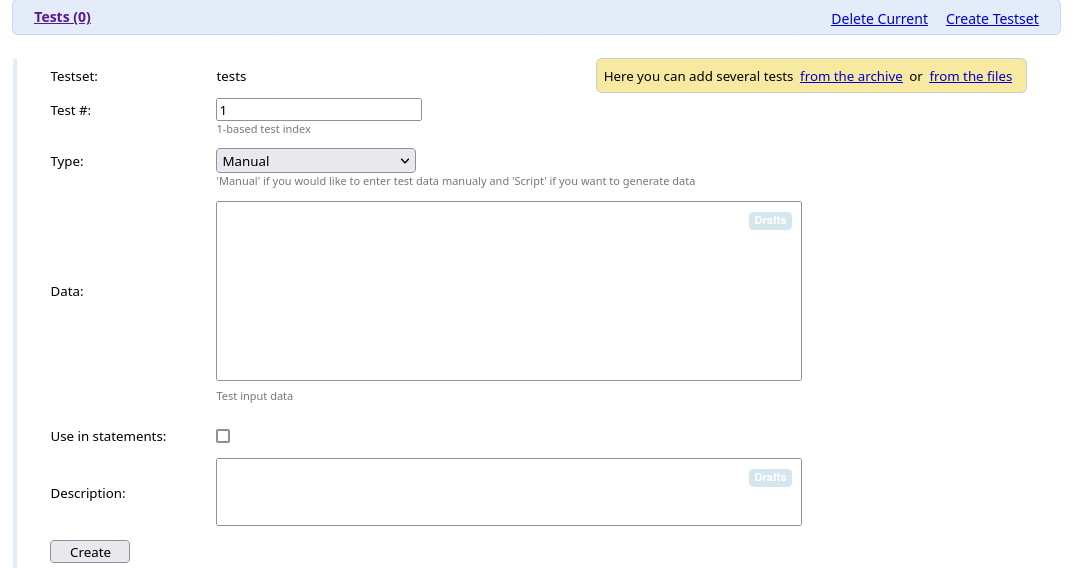
Put the input data into the Data box. The input data will be
To mark this test as an example, check Use in statements checkbox. There will be a text asking us if we wanted to use custom content for input or output. Click it to specify our output.

Use in statements checkbox checked There will be two more boxes appear. Since we will specify our output by hand, we will us the second box only. And because we don't have a validator, a checker and a model solution yet, we must uncheck the checkbox Verify output for statements.
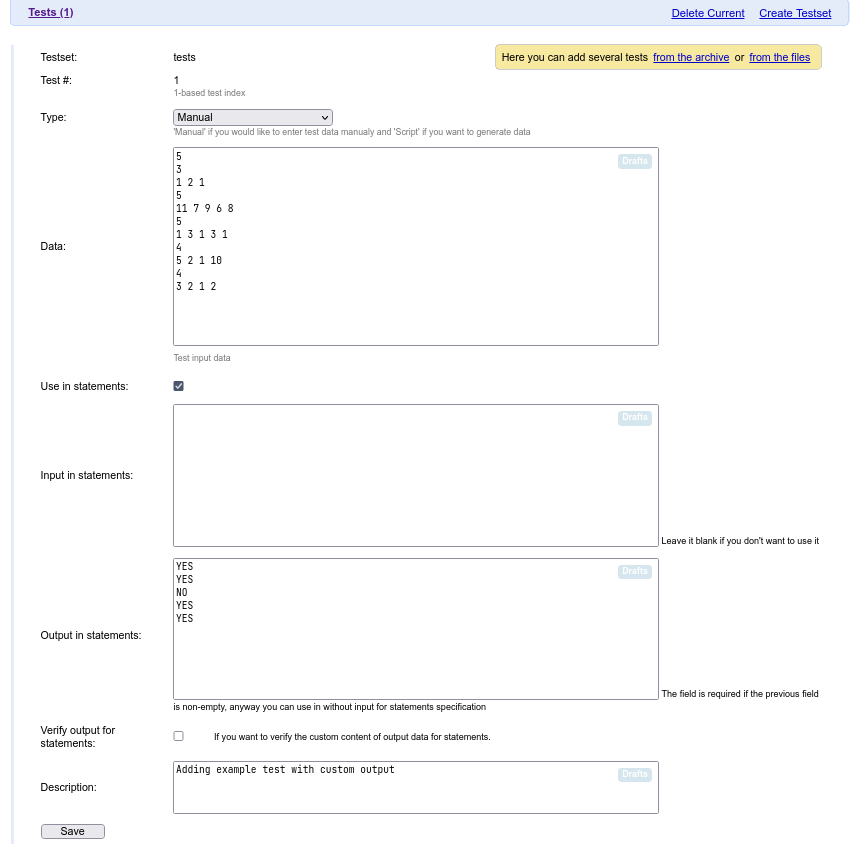
Click save, then return to the Statements page. The example test will appear.
INFO
The first box, Input in statement, can be used when we have the model solution, in that case the output will be generated using the input from the Data box, and the input shown in the statement is from the Input in statement box.
Viewing our result
Because we have added the example, we might as well see our result.
In the Statements page, there are a few view options: In latex, In HTML or in PDF. To see in our in the web format, click In HTML, and in the PDF format, click In PDF.

If you wanted to see the web format live, see the very last section of this tutorial. I also exported the latest PDF version, click here to see it.
Test validation
Test validation is always an important step in contest preparation. A test generator could still be buggy, and might generate invalid tests. So test validation is a way to prevent this kind of mistake, and potentially (but not necessary) help us finding the bug in the generator.
But each problem has its own input format and constraints, and therefore there is no universal way to validate a tests. So to validate a test, the author must write a program called validator for his problem. This is a program that takes an input file and checks the validity of the test for a specific problem. On Polygon, you can write a generator in any tool you like, but it is strictly recommended to use testlib.h to write validators. testlib.h not only eases the writing validator process, but also it make the validation message more readable.
INFO
I put this part before the test generation part, because a validator is generally easy to write, while the test generation is the hardest part.
INFO
Codeforces also allows hacking during contests, and the hack tests will also be validated, using the author's validator.
The Select validator page
When you click the Validator option on the top bar, here is validator page will look like.
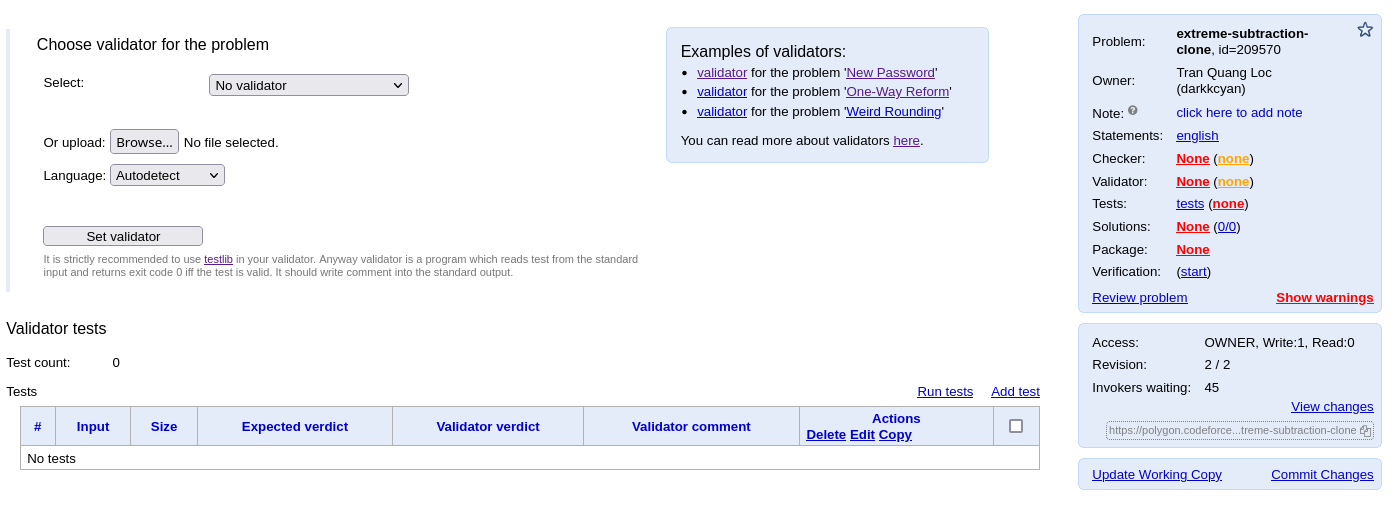
We can see that the Polygon's developers are nice enough to put on some example for us to see, as well as a little guide. I also recommend to read that guide before writing the validator. Here is the link to the guide. There are also some examples in testlib.h's github repository, and I also recommend to take a look at them.
To add your validator, there is a button to upload your validator. There is also a drop-down menu for selecting existing validator. But since there is no standard generator yet, you must add your first before any items appear.
There is a also a section to add the validator tests. Because the test validation step is important, the validator should also be tested thoroughly. But now let's write the validator first.
The validator's implementation
#include "testlib.h"
using namespace std;
const int max_testcount = 30000;
const int max_n = 30000;
const int max_val = 1'000'000;
int main(int argc, char** argv) {
registerValidation(argc, argv);
int testcount = inf.readInt(1, max_testcount, "test-count");
inf.readEoln();
int sum_n = 0;
for (int testcase = 1; testcase <= testcount; ++testcase) {
setTestCase(testcase);
int n = inf.readInt(1, max_n, "n");
sum_n += n;
ensuref(sum_n <= max_n, "sum of n over all cases should not exceed %d", max_n);
inf.readEoln();
inf.readInts(n, 1, max_val, "a");
inf.readEoln();
}
inf.readEof();
return 0;
}#include "testlib.h"
using namespace std;
const int max_testcount = 30000;
const int max_n = 30000;
const int max_val = 1'000'000;
int main(int argc, char** argv) {
registerValidation(argc, argv);
int testcount = inf.readInt(1, max_testcount, "test-count");
inf.readEoln();
int sum_n = 0;
for (int testcase = 1; testcase <= testcount; ++testcase) {
setTestCase(testcase);
int n = inf.readInt(1, max_n, "n");
sum_n += n;
ensuref(sum_n <= max_n, "sum of n over all cases should not exceed %d", max_n);
inf.readEoln();
inf.readInts(n, 1, max_val, "a");
inf.readEoln();
}
inf.readEof();
return 0;
}The validator is simple. But there are some notes for the validator:
- There should be a variable name for each
inf.read*function call. This will produce more readable error messages. - There should be a message for each
ensureffunction call. Thefhere means format, the same asprintfandscanf, and it use the same format asprintf. This is for readability too. - The use of
setTestCase()function is also for readability. - The white-spaces (space, EOL character) should be check properly. For normal problems solved with
PascalorC++, spaces are generally not important. But for the other languages likePython,Java,Kotlin, the input it often read by lines and the tokens are split by spaces. Trailing and duplicated spaces can cause these solutions to fail. - If you don't call
inf.readEof(), there will also be an error for not confirming the input has been fully read.
INFO
The rule about white spaces and EOF mentioned above is called the well-formed policy. More on that later.
Now we can add this validator to Polygon. Remember to click Set validator for confirming the validator to Polygon.
INFO
Polygon also produces some warnings. Warnings are not error, but fixing them is a good practice. For example if you don't put the variable name for test-case, this message will appear when you hover your mouse over the validator name.

TIP
And also note that orange things are often hoverable, and might be some warnings.
For editing the validator, you can click to the validator's name on the right panel. To go to the validator page again, you can click validator option on the top bar, or click the (None) link to the right of the validator name.
Adding validator tests
Yes, the thing that we are using to validate the tests should also be tested! The validator is a program too, and it is written by human. And we human are very often making mistake. But the validator testing process is not complicated, since the validator is often not a complicated program.
To add tests, click Add test in the validator page. The page for adding the tests looks like this.
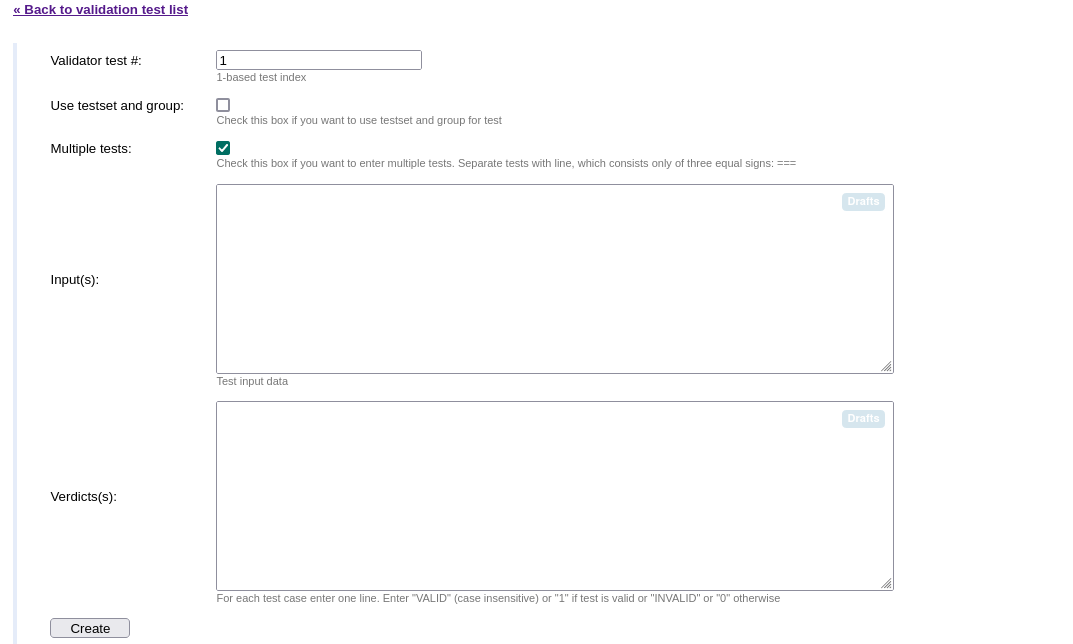
The first input box is for the id of the test. The checkbox Use testset and group: is for a problem with multiple test sets and group, like problem with sub-tasks. Since we don't use sub-task in this problem, we can leave it unchecked. When the checkbox Multiple tests is checked, we can input multiple validator tests instead of one, separated by 3 equal signs (===).
Here are the tests.
0
===
30001
===
1
0
===
1
30001
===
1
1
0
===
1
1
1000001
===
1
1
1
===
2
1
10
30000
===
2
3
10 9 8
3
1 2 30
===
30001
===
1
0
===
1
30001
===
1
1
0
===
1
1
1000001
===
1
1
1
===
2
1
10
30000
===
2
3
10 9 8
3
1 2 3INVALID
INVALID
INVALID
INVALID
INVALID
INVALID
VALID
INVALID
VALIDINVALID
INVALID
INVALID
INVALID
INVALID
INVALID
VALID
INVALID
VALIDINFO
The last line has an extra line break.
For each of the inf.read* and ensuref function calls, I add two tests for it -- one with a value lower than the lower bound, and one with a value higher than the upper bound. The description for the test is as follows.
- The first two are for testing the value of
test-count. - The next two are for testing the value of
n. - And the following two are for the value of
a. - The next test is to test a very small test.
- The next test is for testing the
ensurefstatement, that is, ensuring if the sum ofndoes not exceed . - And finally, I add another small random test.
The rule of thumb is the tests must cover what should be tested, and in this case they are the inf.read* and ensuref function calls.
If you notice, there are test that does not follow the format, like in the second test I only put the number of test cases there. But here I wanted to test the constraints only, and we can consider the validator correct when it produce the correct verdict and error message. For testing the input formats, we already have two tests, but more can be added.
After adding the tests, you can go back to the Validator page and run the tests. Here is the validator test result.
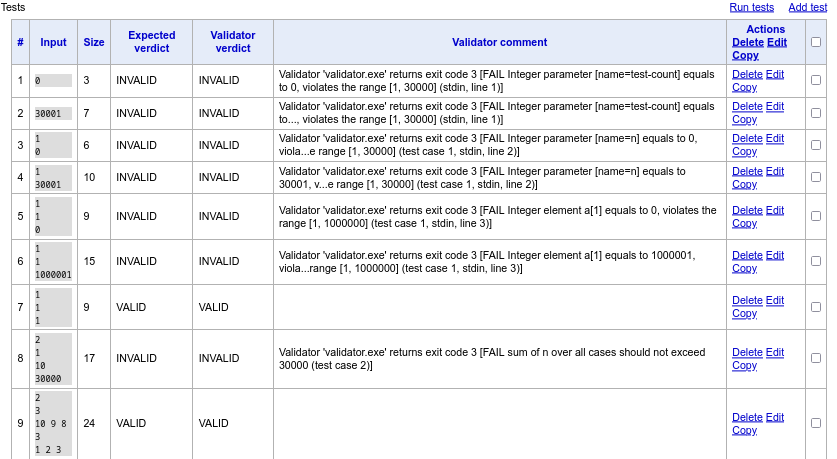
Remember to check the verdicts and the Validator comments carefully.
Our third commit
You know the drill by now. We have added the validator, with its tests, so it is a good moment to make another commit. The commit message can be Add validator with validator tests.
Of course, this commit can be broken into two smaller commits: one when the validator is added, and one when you are finished with the tests. Here I made one commit to not break the flow of the post.
In some cases, you might failed some validator tests, you still can made a commit. After fixing the bug, you can create another commit like Fix validator bug .... Again, we should treat the it as a diary or journal.
The checker
A checker is a program for checking whether or not an answer is correct. What is the correctness anyway? For most of the time, this means the answer of the participant is the same as the jury's (or the author's) answer. But that is not the case for some of the problems. There are problems with non-unique answer, and a specific checker must be created to check that. An example of non-unique answer problem is to trace a shortest path between two vertices in a graph. If the answer is the path, then the checker must check if two given vertices are reachable using the path, and if the path is truly the shortest.
Before going further, let's look at the Select checker page.
The Select checker page
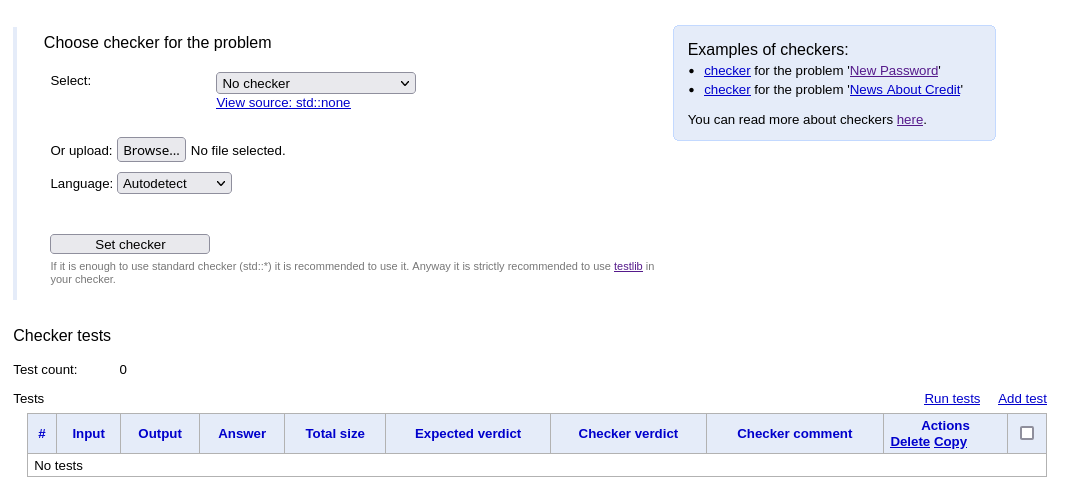
Select checker pageThe page is almost identical as the Select validator page, with the same functionalities, as well as the examples. And I also recommend to read the guide for writing checker with testlib.h before writing your own.
Different from the Select validator page, there are some standard checkers ready to use. As mentioned before, usually the answer of the participant is checked against the answer of jury, and there are some checkers for some typical output formats.
The standard checkers
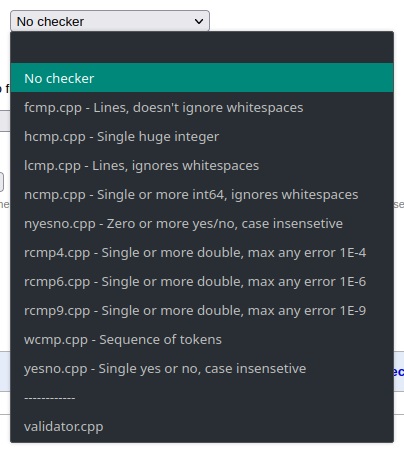
For most cases, you can actually always choose the checker wcmp.cpp (words comparator (?)), since comparing integers for most cases is the same as comparing words (or tokens). But with different kind of input, it make more sense to use the exact checker, for example, the checker ncmp.cpp (numbers comparator (?)) should be used for comparing sequence of integers. For a specific type of output, the corresponding checker can also check for the output formatting, as well as producing more readable messages. The case that we should not use the checker for tokens is when comparing real numbers output, since the checker should checking the answers relatively or absolutely with a small value.
In our case, we can use the checker nyesno.cpp (not yesno.cpp, since we are comparing sequence of YES and NO tokens, and not just one!). Selecting it then we are done with the checker part.
INFO
After selecting the checker, it is possible to see the checker's source code.
Writing our own checker
It is always recommended to use the standard checkers when possible, because the standard checker is well tested and produces readable error messages. But when the answer is non-unique, we must write our own.
Even though we already have our own checker, for the sake of the completeness, I think it worth to write our own checker in this tutorial.
The standard checker is very general, since it is input independent. For this problem, let's make the check the output with the dependency on the number of test cases. That is, our checker should check if the number of read token is the same as the number of test cases.
The readAns paradigm
This is one part in the guide for writing checker. The main idea is, when writing a checker, it is a good practice to write a function for reading and (partially) checking the answer from a stream, and use it to read the participant's answer as well as the jury's answer. After that, we can fully check these answers against each other.
The obvious reason to use readAns paradigm is to reduce the length of the code. We use one function to read both the participant's answer and the jury's answer.
But there is a more serious problem that readAns paradigm solves. This paradigm forces the same logic on the reading processes of participant's answer and the jury's answer. This means we don't entirely rely on the jury, but try to treat the jury's answer and the participant's answer as equally as possible. To see how that helps us, let's consider the shortest path problem again. What if the participant produces a valid path, but its length is shorter than the path length in the jury's answer? There might be a bug in the model solution (for producing non-optimal answer), and there might also be a bug in the checker (for incorrectly validating the answer), or even both. But either way, the fault is still at the author's side, and there something is very wrong if that happens. Without readAns paradigm, the checker will more likely to rely on the jury's answer, and the above problem may go undetected!
That's being said, the readAns paradigm should always be used when creating a custom checker to reduce the risk of errors.
The checker's implementation
#include "testlib.h"
#include <bits/stdc++.h>
using namespace std;
const auto YES = "YES";
const auto NO = "NO";
const auto GENERIC_WORD_PATTERN = "[a-zA-Z]+";
int test_count;
vector<string> read_answer(InStream &stream) {
vector<string> res;
for (int i = 1; i <= test_count; ++i) {
setTestCase(i);
auto token = upperCase(stream.readToken(GENERIC_WORD_PATTERN, "token"));
stream.quitif(token != YES && token != NO, _pe,
"Expected YES or NO token, but found \"%s\"",
token.c_str());
res.push_back(token);
}
stream.quitif(!stream.seekEof(), _pe, "Expected EOF after reading %d token(s)",
test_count);
return res;
}
int main(int argc, char **argv) {
registerTestlibCmd(argc, argv);
test_count = inf.readInt();
auto out_tokens = read_answer(ouf);
auto ans_tokens = read_answer(ans);
for (int i = 1; i <= test_count; ++i) {
setTestCase(i);
if (out_tokens[i - 1] != ans_tokens[i - 1]) {
quitf(_wa, "expected %s, found %s", ans_tokens[i - 1].c_str(),
out_tokens[i - 1].c_str());
}
}
quitf(_ok, "%d token(s)", test_count);
return 0;
}#include "testlib.h"
#include <bits/stdc++.h>
using namespace std;
const auto YES = "YES";
const auto NO = "NO";
const auto GENERIC_WORD_PATTERN = "[a-zA-Z]+";
int test_count;
vector<string> read_answer(InStream &stream) {
vector<string> res;
for (int i = 1; i <= test_count; ++i) {
setTestCase(i);
auto token = upperCase(stream.readToken(GENERIC_WORD_PATTERN, "token"));
stream.quitif(token != YES && token != NO, _pe,
"Expected YES or NO token, but found \"%s\"",
token.c_str());
res.push_back(token);
}
stream.quitif(!stream.seekEof(), _pe, "Expected EOF after reading %d token(s)",
test_count);
return res;
}
int main(int argc, char **argv) {
registerTestlibCmd(argc, argv);
test_count = inf.readInt();
auto out_tokens = read_answer(ouf);
auto ans_tokens = read_answer(ans);
for (int i = 1; i <= test_count; ++i) {
setTestCase(i);
if (out_tokens[i - 1] != ans_tokens[i - 1]) {
quitf(_wa, "expected %s, found %s", ans_tokens[i - 1].c_str(),
out_tokens[i - 1].c_str());
}
}
quitf(_ok, "%d token(s)", test_count);
return 0;
}If you have seen the source code of nyesno.cpp, I have borrowed some part from it. With the dependence on the number of test cases, as well as using the readAns paradigm, the code is significantly shorten.
Here I used a function stream.quitif(condition, verdict, message). If the condition is true, then the verdict will be returned with the message. But if used with the input stream (inf) or the answer stream (ansf), then the verdict will always be _fail, no matter what is passed to the second parameter. This make sense because the input should be correct (validated by the validator), and the answer should also be correct before passing to the checker. And in case of failure, that's mean the there might be a bug in the checker or the solution, as we have discussed above.
INFO
In the checker, we don't need to strictly follow the input format as we have done in the validator. In other words, we don't need to read the spaces or EOLN characters. That is because testlib.h only forces strict input format when calling registerValidator, while that is not the case with registerTestlibCmd. And also the test was validated by the validator anyway before passing to the checker.
Adding the checker tests
As in the case of the validator, we must also test the checker. And as before, the tests must cover the functionalities that we wanted to test. And in this case:
- The token format (should be
YESorNOcase insensitive). - The number of tokens (should not be less or more than the number of test cases).
- The participant's answer and the jury's answer must be matched.
To add the tests, click the Add test link to go to the Create checker test page.
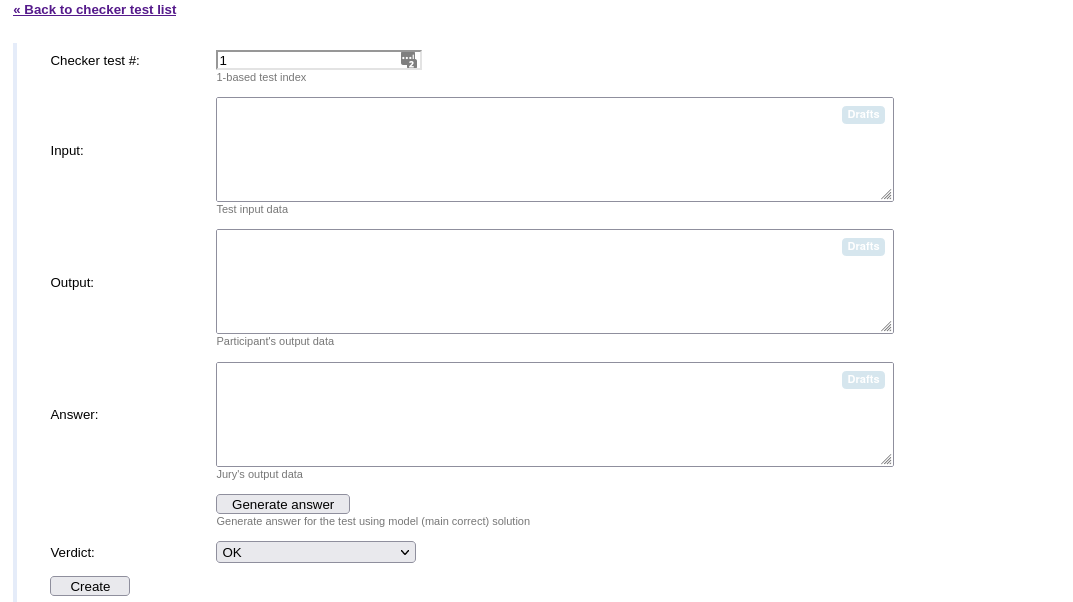
Here there are input boxes for the Input, the Output and the Answer. It is not simple as with the validator case, so we can not specify multiple tests within a text area.
There is a also a button for generating the answer from the model solution. So if you have a model solution, pressing that button will save us a little time for not needing to recreate the true answer. But now let's make them by hand.
Here are the tests. For space-saving, each test's parts are put into one file with the separator ===section===. Also the verdict CRASHED corresponds to the _fail verdict in testlib.h.
Here are the results of the tests.
=== Input ===
6
5
1 3 1 3 1
5
1 3 1 3 1
1
1
1
1
1
1
1
1
=== Output ===
no
NO
yes
yeS
yEs
yES
=== Answer ===
nO
No
Yes
YeS
YEs
YES
=== Verdict ===
OK=== Input ===
6
5
1 3 1 3 1
5
1 3 1 3 1
1
1
1
1
1
1
1
1
=== Output ===
no
NO
yes
yeS
yEs
yES
=== Answer ===
nO
No
Yes
YeS
YEs
YES
=== Verdict ===
OK=== Input ===
2
1
1
1
1
=== Output ===
yes
=== Answer ===
yes
yes
=== Verdict ===
PRESENTATION_ERROR=== Input ===
2
1
1
1
1
=== Output ===
yes
=== Answer ===
yes
yes
=== Verdict ===
PRESENTATION_ERROR=== Input ===
2
1
1
1
1
=== Output ===
yes
yes
=== Answer ===
yes
=== Verdict ===
CRASHED=== Input ===
2
1
1
1
1
=== Output ===
yes
yes
=== Answer ===
yes
=== Verdict ===
CRASHED=== Input ===
1
1
1
=== Output ===
nice
=== Answer ===
yes
=== Verdict ===
PRESENTATION_ERROR=== Input ===
1
1
1
=== Output ===
nice
=== Answer ===
yes
=== Verdict ===
PRESENTATION_ERROR=== Input ===
1
1
1
=== Output ===
yes
yes
=== Answer ===
yes
=== Verdict ===
PRESENTATION_ERROR=== Input ===
1
1
1
=== Output ===
yes
yes
=== Answer ===
yes
=== Verdict ===
PRESENTATION_ERROR=== Input ===
1
1
1
=== Output ===
yes
=== Answer ===
yes
yes
=== Verdict ===
CRASHED=== Input ===
1
1
1
=== Output ===
yes
=== Answer ===
yes
yes
=== Verdict ===
CRASHED=== Input ===
1
1
1
=== Output ===
no
=== Answer ===
yes
=== Verdict ===
WRONG_ANSWER=== Input ===
1
1
1
=== Output ===
no
=== Answer ===
yes
=== Verdict ===
WRONG_ANSWER=== Input ===
1
5
1 3 1 3 1
=== Output ===
yes
=== Answer ===
no
=== Verdict ===
WRONG_ANSWER=== Input ===
1
5
1 3 1 3 1
=== Output ===
yes
=== Answer ===
no
=== Verdict ===
WRONG_ANSWER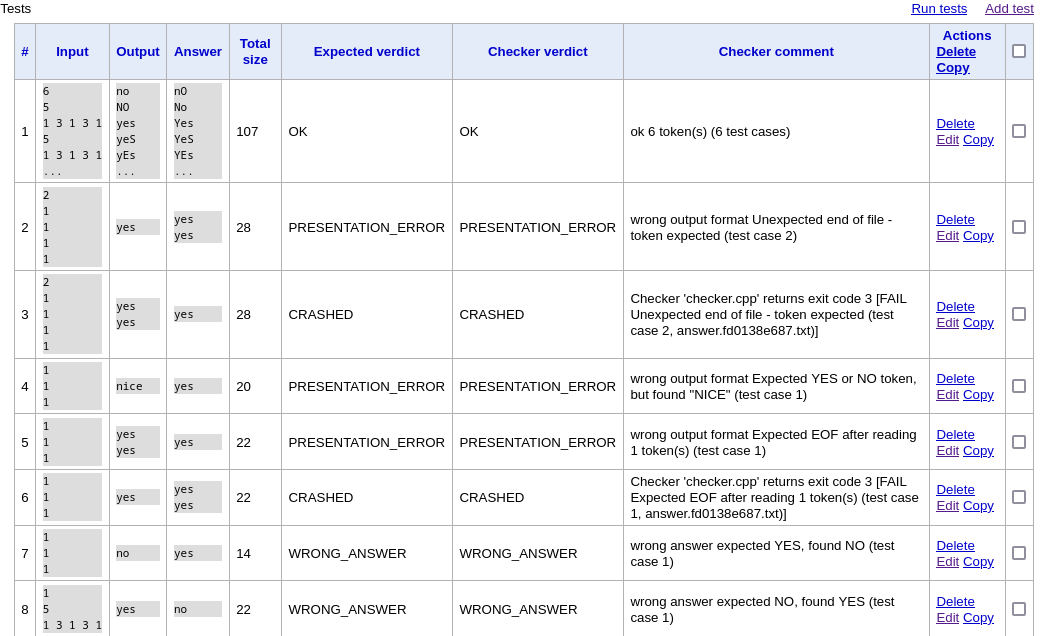
Remember to check the verdicts and the Checker comments carefully.
A commit again
Let's do the commit with the message Add checker with checker tests. As before, of course we can split this commit into two smaller ones like in the validator case. Or there might also be a bug in our code, which should also be fixed and saved with another commit. This part is completely similar to the validator. But it is up to you to decide when is the right time to make a commit.
The model solution
A model solution is required in order to generate the output for the tests. Arccording to the editorial, the solution is quite short. Here is the full solution, quoted from the editorial.
The problem sounds like this -- check that there are increasing and decreasing arrays, the element-wise sum of which is equal to the given array.
This problem can be solved greedily. Let's maximize each element of the decreasing array (let's call this array , and the increasing one ). Suppose initial array is and we have solved the problem on a prefix of length . Then, for the element , and must be fulfilled. Rewriting the second inequality and combining with the first one, we get . It is clear that taking is the best by construction.
Because it is very short, here are the solutions in Python and C++.
testcount = int(input())
for testcase in range(testcount):
n = int(input())
v = list(map(int, input().split()))
a, b = [0] * n, [0] * n
a[0] = v[0]
has_ans = True
for i in range(1, n):
a[i] = min(a[i - 1], v[i] - b[i - 1])
if a[i] < 0:
has_ans = False
break
b[i] = v[i] - a[i]
print("YES" if has_ans else "NO")testcount = int(input())
for testcase in range(testcount):
n = int(input())
v = list(map(int, input().split()))
a, b = [0] * n, [0] * n
a[0] = v[0]
has_ans = True
for i in range(1, n):
a[i] = min(a[i - 1], v[i] - b[i - 1])
if a[i] < 0:
has_ans = False
break
b[i] = v[i] - a[i]
print("YES" if has_ans else "NO")#include <bits/stdc++.h>
using namespace std;
int main() {
cin.tie(0)->sync_with_stdio(0);
int ntest; cin >> ntest;
while (ntest--) {
int n; cin >> n;
vector<int> v(n);
for (auto& i: v) cin >> i;
vector<int> a(n), b(n);
a[0] = v[0];
bool has_ans = true;
for (int i = 1; i < n; ++i) {
a[i] = min(a[i - 1], v[i] - b[i - 1]);
if (a[i] < 0) {
has_ans = false;
break;
}
b[i] = v[i] - a[i];
}
cout << (has_ans ? "YES" : "NO") << '\n';
}
return 0;
}#include <bits/stdc++.h>
using namespace std;
int main() {
cin.tie(0)->sync_with_stdio(0);
int ntest; cin >> ntest;
while (ntest--) {
int n; cin >> n;
vector<int> v(n);
for (auto& i: v) cin >> i;
vector<int> a(n), b(n);
a[0] = v[0];
bool has_ans = true;
for (int i = 1; i < n; ++i) {
a[i] = min(a[i - 1], v[i] - b[i - 1]);
if (a[i] < 0) {
has_ans = false;
break;
}
b[i] = v[i] - a[i];
}
cout << (has_ans ? "YES" : "NO") << '\n';
}
return 0;
}Adding the solutions to Polygon
To add the solutions to Polygon, click the option Solutions files on the top bar, or on the right panel, None or (0/0) link at the Solutions section.
INFO
None and (0/0) are displayed when there is no solution yet. When there are solutions, None will be replaced with the name of the Model solution, and (0/0) will be replaced by (x/y), where is the total number of solutions, and is the number of the correct solutions.

The page is simple. There is a link to add the solutions. Now let's add the above two solutions first. Here is the page after adding the solutions.

INFO
The solution name (without the extension part) must be all different.
By default, the first uploaded solution will be the Main correct (or model) solution, and other solution will be just be Correct solution. Even though there can be more than one correct solutions, the Main correct solution will be used to generate the output. You can change the solution type by click the Change? option at the Type column for each solution.
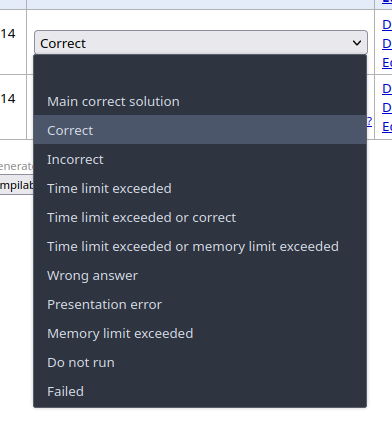
I think the types are self-explanatory, since most of them are normal verdicts in a contest. There are more general verdict like Incorrect means that the solution of this type can have the verdict either be WA, or TLE or MLE, or maybe Presentation error. The Incorrect verdict can be used when the solution has a different verdict for a different input.
There is no limit for a given solution type. Instead, if there are more solutions, with different predictable verdicts, then they should be added as well. The point of having multiple solutions, either correct or incorrect, is to verify the test-set. The test-set should be strong enough to kill specific incorrect solutions, while must remain correct for all correct solutions to pass.
More commits!
We make a commit with the message Add two correct solutions.
Stress testing. Our first test generator.
Before adding the tests, we must ensure the correctness of the model solution first, because the model solution is used to generate the output of the tests. In this section, we are going to test the correctness of the model solution with stress testing.
What is stress testing?
Here is the Wikipedia page about stress testing. In competitive programming, stress testing is used not for all of the reason stated in the Wikipedia page, but there is a main point:
- to confirm mathematical model is accurate enough in predicting breaking points or safe usage limits
Stress testing on Polygon is conducted with multiple solutions (can also be incorrect solution). The output of these solution will be checked against the output of the model solution. The tests for stress testing is also generated from a test generator.
With this way of doing stress testing, not only we can ensure the correctness of the mathematical model, but also eliminate the implementation errors. Suppose we are stress testing two solutions against each other. Both solution have the equal chance of being incorrect, since we have not tested them before. But with stress testing, implementation errors is very easy to detect, because the likelihood of two solutions having the same implementation errors is not high. If the result of these solutions are not matched, we should not only suspect the errors in one solution, but in both solutions. And after fixing the implementation errors (in both solutions), if the output of the solutions are still not matched, then we can conclude that the mathematical model is incorrect, with a concrete counter example. From there, we should find the error in the proof, or try to find another solution. If two solutions are not enough to guarantee the correctness, remember that Polygon allows stress testing with multiple solutions!
So to do stress testing, we are going to add another solution, as well as create a test generator.
What solution are we going to test against?
First of all, this solution should be a correct solution. In order to reduce the implementation errors, this solution should solve this problem in a different way. Since we only use this solution for checking the correctness of the model solution, we don't need this solution to be fast. With these in mind, brute-forcing is always a candidate. The brute-force solution is often more correct because it uses less assumptions.
In this problem, brute-force can be done with simulation -- we simply try all possible ways to decrease the input array, and when we have all , we can conclude that there is an answer. Such simulation can be implemented with recursion, but to make it a little faster, we can also use memorization -- that is, storing all visited states.
#include <bits/stdc++.h>
using namespace std;
set<vector<int>> visited;
bool solve(vector<int> a) {
bool all_0 = true;
for (auto i: a) {
if (i < 0) return false;
if (i) all_0 = false;
}
if (all_0) return true;
if (visited.count(a)) return false;
visited.insert(a);
// decrease the prefix
for (auto& i: a) {
--i;
if (solve(a)) return true;
}
for (auto& i: a) ++i;
// decrease the suffix
for (int i = (int)a.size(); i--; ) {
a[i] --;
if (solve(a)) return true;
}
return false;
}
int main() {
cin.tie(0)->sync_with_stdio(0);
int ntest; cin >> ntest;
while (ntest--) {
int n; cin >> n;
vector<int> a(n);
for (auto& i: a) cin >> i;
visited.clear();
cout << (solve(a) ? "YES" : "NO") << '\n';
}
return 0;
}#include <bits/stdc++.h>
using namespace std;
set<vector<int>> visited;
bool solve(vector<int> a) {
bool all_0 = true;
for (auto i: a) {
if (i < 0) return false;
if (i) all_0 = false;
}
if (all_0) return true;
if (visited.count(a)) return false;
visited.insert(a);
// decrease the prefix
for (auto& i: a) {
--i;
if (solve(a)) return true;
}
for (auto& i: a) ++i;
// decrease the suffix
for (int i = (int)a.size(); i--; ) {
a[i] --;
if (solve(a)) return true;
}
return false;
}
int main() {
cin.tie(0)->sync_with_stdio(0);
int ntest; cin >> ntest;
while (ntest--) {
int n; cin >> n;
vector<int> a(n);
for (auto& i: a) cin >> i;
visited.clear();
cout << (solve(a) ? "YES" : "NO") << '\n';
}
return 0;
}We add this solution to Polygon the same was as in the previous section, but we set the type of this solution to Time limit exceeded, because it can produce correct result, but it will run very slow on a big test case.
Our first generator
The Files page
To add a generator to Polygon, we must use the Files page (from the Files option on the top bar) instead of the Tests page. In the Files page, there are also added source files like our validator.cpp and checker.cpp, as well as testlib.h. The other files are for PDF file generation with .
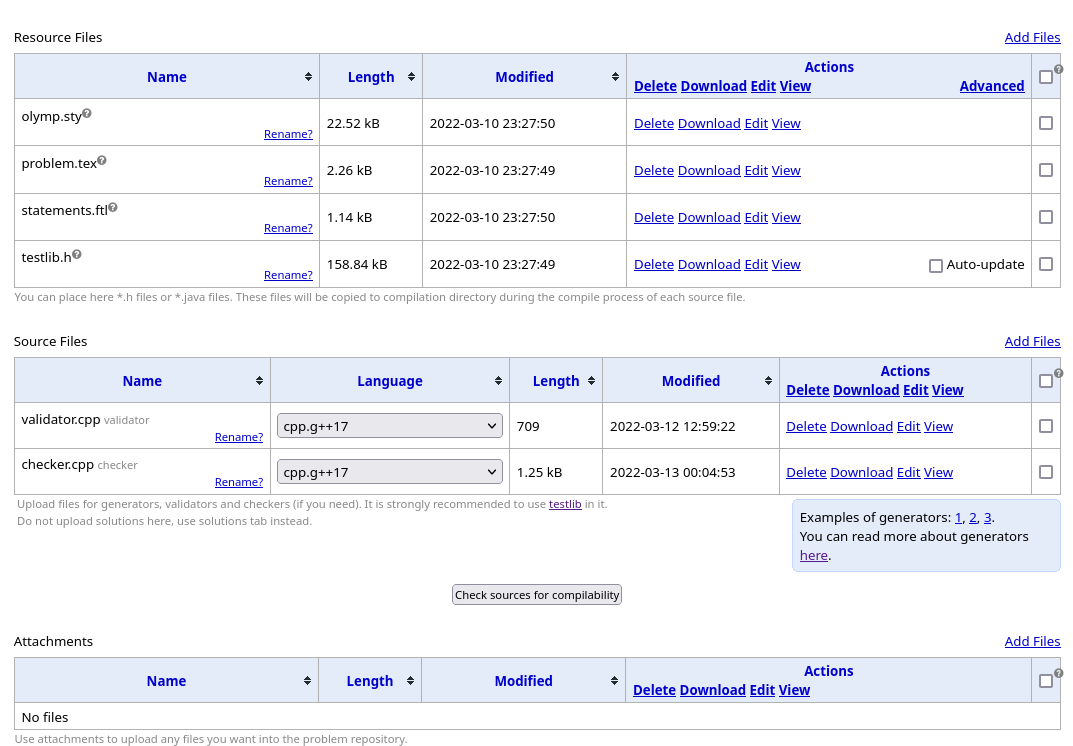
As before, the Polygon developers are very nice, leaving us some examples, as well as the guide for writing a generator with testlib.h. Please read the guide before continuing.
Functionalities for a test generator
Before writing the out first generator, I think it worth pointing out some functionalities of a generator. I wanted to make it clear, not for this generator, but also the future generators, and also for this part -- stress testing.
Re-usability
A generator is used not only to generate a test, but also multiple tests. And with a single generator we hope to generate a variety of tests. In this problem, for example, the test cases should have different lengths, the array elements should have different value ranges, and the answer for the tests should be controllable (having a specific amount of YES and NO answers).
For this, a generator should have the ability to accept our external parameters/options to generate a test. Normally, a program can accepts arguments from command line, and these options can be accessed via the argc and argv arguments, accepted by the main function. Polygon does support this way of passing arguments to the generator, and you can use argc and argv as intended.
Recently, testlib.h supports a new way of way (or the old way but fancier) of passing and getting the arguments, called opts. For more details about opts, and see it in action, please refer to this guide.
Random number generation
The tests are often randomly generated by a generator. As you may have known before, the process for generating the random number (random number generation -- or RNG for short) of a computer program is pseudo-random. The numbers generated by a computer program is not completely random, but they must based on some initial value, called a seed.
For RNG, the testlib.h generator guide already provides functions for generating random numbers. But they did not specify how exactly the generator chooses the random seed, besides this sentence:
... a generator must output the same test when compiled by any compiler on any platform if it is run in the same way (using the same command line parameters).
This is a small detail, but I wanted to point it out before going to stress testing. The arguments passed to the generator are hashed, and the hash code is used as the random seed. Therefore, the test will be the same for the same set of arguments.
We can conclude that arguments for the generator are important: it determined both the shape of the test, as well as the random seed!
The first generator's implementation
#include "testlib.h"
#include <bits/stdc++.h>
using namespace std;
int main(int argc, char** argv) {
registerGen(argc, argv, 1);
// getting the options
int test_count = opt<int>("test-count");
int sum_n = opt<int>("sum-n");
int min_a = opt<int>("min-a");
int max_a = opt<int>("max-a");
auto lengths = rnd.partition(test_count, sum_n);
cout << test_count << '\n';
for (auto n: lengths) {
vector<int> a(n);
for (auto& i: a) {
i = rnd.next(min_a, max_a);
}
cout << n << '\n';
println(a); // println will not print additional spaces
// at the end of the line
}
return 0;
}#include "testlib.h"
#include <bits/stdc++.h>
using namespace std;
int main(int argc, char** argv) {
registerGen(argc, argv, 1);
// getting the options
int test_count = opt<int>("test-count");
int sum_n = opt<int>("sum-n");
int min_a = opt<int>("min-a");
int max_a = opt<int>("max-a");
auto lengths = rnd.partition(test_count, sum_n);
cout << test_count << '\n';
for (auto n: lengths) {
vector<int> a(n);
for (auto& i: a) {
i = rnd.next(min_a, max_a);
}
cout << n << '\n';
println(a); // println will not print additional spaces
// at the end of the line
}
return 0;
}This generator accepts 4 arguments/options:
test-count-- the number of of test cases.sum-n-- the sum of array lengths over all test cases.min-aandmax-a-- the minimum value and maximum value for array's elements.
The generator will generate test-count totally random arrays. To determine the length for each array, I use rnd.partition() function.
rnd.partition(size, sum, [min_part=1])returns a vector of the given size, the sum of whose elements must equal the second parameter, and elements must not be lower thanmin_part.
This function is not in the testlib.h generator guide, because this function is added after the guide. See the feature list of testlib.h for more newly added functions.
There is also println function, which will print elements of a C++ collection space-separately without any trailing or double spaces. Remember that the trailing spaces will cause the validation failure.
Even though it generates totally random tests, for test with very small constraints, the rate of YES tests will not be small, making the generator suitable for stress testing.
Let's run it locally to generate a test with 5 test cases, the sum of length is 20, and the value range is from 1 to 5.
$ ./gen-totally-random -test-count 5 -sum-n 20 -min-a 1 -max-a 5
5
5
2 1 4 2 2
4
3 5 1 5
9
3 3 3 5 1 1 1 3 1
1
3
1
3$ ./gen-totally-random -test-count 5 -sum-n 20 -min-a 1 -max-a 5
5
5
2 1 4 2 2
4
3 5 1 5
9
3 3 3 5 1 1 1 3 1
1
3
1
3It is looking good. Let's add it to Polygon, via the Files page.
Adding the stress test
The stresses page

This page can be accessed via the Stresses option on the top bar. The layout of the stresses page is similar to the previous pages: one table, and one button to add an item.
Let's add a stress to Polygon.
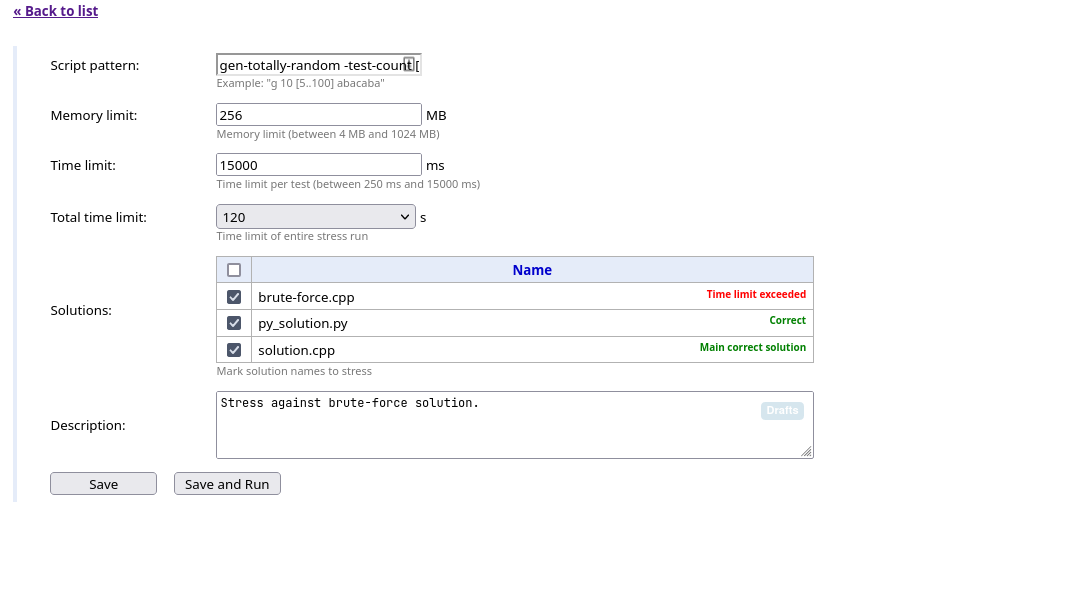
In this page:
- The
Script patterninput allows us to write a script pattern for test generation. Here the script pattern is
gen-totally-random -test-count [1..10] -sum-n 20 -min-a 1 -max-a 5gen-totally-random -test-count [1..10] -sum-n 20 -min-a 1 -max-a 5Polygon also supports minimal random parameters generation. Here I wanted the test-count to be a random number between and . A fixed sum-n and a randomized test-count are good to randomize the test cases n without worrying about the constraints.
- There are also
Time limitandMemory limitinput boxes, because the stress-tested solution might not work well under the original problem's constraints. - The
Total time limitis the total time to do stresses. If60 secondsis chosen, the stress will repeatedly run till the minute mark is reached. - Finally, Polygon allows us to choose which solutions to run. Note that it is not necessary to add the model solution to the stress, since Polygon will use its output to check the other solutions anyway. But sometime it might still be a good idea, in case of changing the model solution.
For the configuration as in the image, click Save and Run to run the stress. After at least minutes it will produce the OK result. It might be higher than minutes because of some other reasons, for example, if you update the generators or solutions, recompilation will take time.

INFO
Polygon will not refresh itself for most of the time, so you must press refresh by yourself.
Finding countertest
But wait, something is off. Isn't the arguments is the same for most of the time? We only make test-count random, with a very small range. So did we only do stress testing with only 10 tests repeatedly? Well NO. To see why, let's create another stress. It will be the same as the above stress, but now with lower time limit for the brute-force solution to have TLE verdict.
After a few seconds after running, we will receive the following table.

By clicking the view link of the new stress, we got the following page.
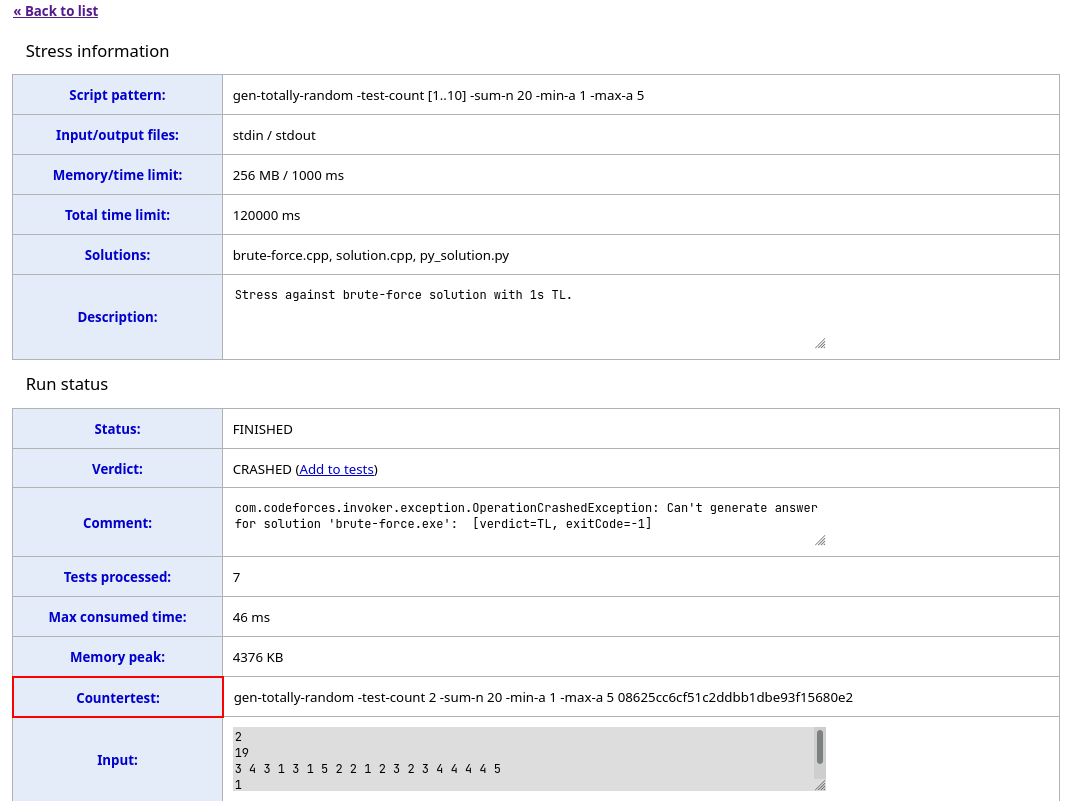
In the page, it says that the brute-force solution run too long to generate a result, hence the TL verdict. If you see the Countertest row, there is a command, but now it has an additional string after it. This is the mechanism of Polygon for generating totally random tests. By appending a random string at the end of the command, the random seed will be different even for a fixed specified set of options.
Commit, commit, commit!
We can safely conclude that our solution is correct and contains no bug. Now we can do a commit, for example, Add brute-force solution and 2 stresses. And of course, it is better to split it into smaller commits, but again, we can do the commit here to not break the flow of the post.
Test generation
A better test generator
We already have a generator. But that generator in general is not good. A random array is very unlikely to have an answer YES, and we need to fix that. How about we don't generate the array, but the increasing array and decreasing array as in the editorial, then summing them up? Doing so will guarantee to have the answer YES because that is what the problem is asking the participant to do.
INFO
In the editorial, the name of the increasing array is actually and the decreasing one is . While making this blog, I have their names wrong. In my defense, making the increasing array is more natural than the other way around. So I'll keep it this way.
For this algorithm, there are some problems when reusing the code from gen-totally-random.cpp
- We can not use
min-aandmax-afor this algorithm. - That are only
YEStests, how about theNOtests?
The first problem can be partially solved by adding the value for arrays and separately. For the second problem, we are going to generate arrays and now, so let's also add an option to generate them randomly instead of sorted. There should also be an option to specify how many of them are YES, and how many are NO.
Here is the generator with the above idea.
#include "testlib.h"
#include <bits/stdc++.h>
using namespace std;
vector<int> random_array(int size, int min_value, int max_value) {
vector<int> res(size);
for (auto& i: res) i = rnd.next(min_value, max_value);
return res;
}
int main(int argc, char** argv) {
registerGen(argc, argv, 1);
// getting the options
int test_count = opt<int>("test-count");
int sum_n = opt<int>("sum-n");
int yes_count = opt<int>("yes-count");
// value range for the array a (i.e the increasing array)
int min_a = opt<int>("min-a");
int max_a = opt<int>("max-a");
// value range for the array b (i.e the decreasing array)
int min_b = opt<int>("min-b");
int max_b = opt<int>("max-b");
auto lengths = rnd.partition(test_count, sum_n);
cout << test_count << '\n';
for (int i = 0; i < test_count; ++i) {
int n = lengths[i];
bool is_yes_test = i < yes_count;
auto a = random_array(n, min_a, max_a);
auto b = random_array(n, min_b, max_b);
if (is_yes_test) {
sort(a.begin(), a.end());
sort(b.rbegin(), b.rend());
}
for (int i = 0; i < n; ++i) a[i] += b[i];
cout << n << '\n';
println(a);
}
return 0;
}#include "testlib.h"
#include <bits/stdc++.h>
using namespace std;
vector<int> random_array(int size, int min_value, int max_value) {
vector<int> res(size);
for (auto& i: res) i = rnd.next(min_value, max_value);
return res;
}
int main(int argc, char** argv) {
registerGen(argc, argv, 1);
// getting the options
int test_count = opt<int>("test-count");
int sum_n = opt<int>("sum-n");
int yes_count = opt<int>("yes-count");
// value range for the array a (i.e the increasing array)
int min_a = opt<int>("min-a");
int max_a = opt<int>("max-a");
// value range for the array b (i.e the decreasing array)
int min_b = opt<int>("min-b");
int max_b = opt<int>("max-b");
auto lengths = rnd.partition(test_count, sum_n);
cout << test_count << '\n';
for (int i = 0; i < test_count; ++i) {
int n = lengths[i];
bool is_yes_test = i < yes_count;
auto a = random_array(n, min_a, max_a);
auto b = random_array(n, min_b, max_b);
if (is_yes_test) {
sort(a.begin(), a.end());
sort(b.rbegin(), b.rend());
}
for (int i = 0; i < n; ++i) a[i] += b[i];
cout << n << '\n';
println(a);
}
return 0;
}In this current version, all the YES tests are at the beginning, while all the NO tests are at the end. Even though it is not good for a test, but it does help us seeing the result of the test easier. And we will fix this for the future version of the generator, but let's keep this for now.
Let's run it
$ ./gen-v1 -test-count 5 -sum-n 50 -yes-count 2 -min-a 1 -max-a 100 -min-b 1 -max-b 100 > test.txt
$ cat test.txt
5
5
93 68 52 118 122
10
108 109 75 78 58 57 80 82 84 98
14
131 112 138 86 161 76 97 51 94 154 29 134 86 26
17
25 62 80 146 139 119 199 92 152 72 70 89 47 125 94 96 93
4
144 46 117 36
$ ./solution < test.txt
YES
YES
NO
NO
NO$ ./gen-v1 -test-count 5 -sum-n 50 -yes-count 2 -min-a 1 -max-a 100 -min-b 1 -max-b 100 > test.txt
$ cat test.txt
5
5
93 68 52 118 122
10
108 109 75 78 58 57 80 82 84 98
14
131 112 138 86 161 76 97 51 94 154 29 134 86 26
17
25 62 80 146 139 119 199 92 152 72 70 89 47 125 94 96 93
4
144 46 117 36
$ ./solution < test.txt
YES
YES
NO
NO
NOHere the first two tests are YES and the rest are NO. I purposely choose a larger range so the test that should not be YES will be more likely to produce the NO answer.
This generator works, so let's add this to Polygon.
Adding the tests
The Create tests page
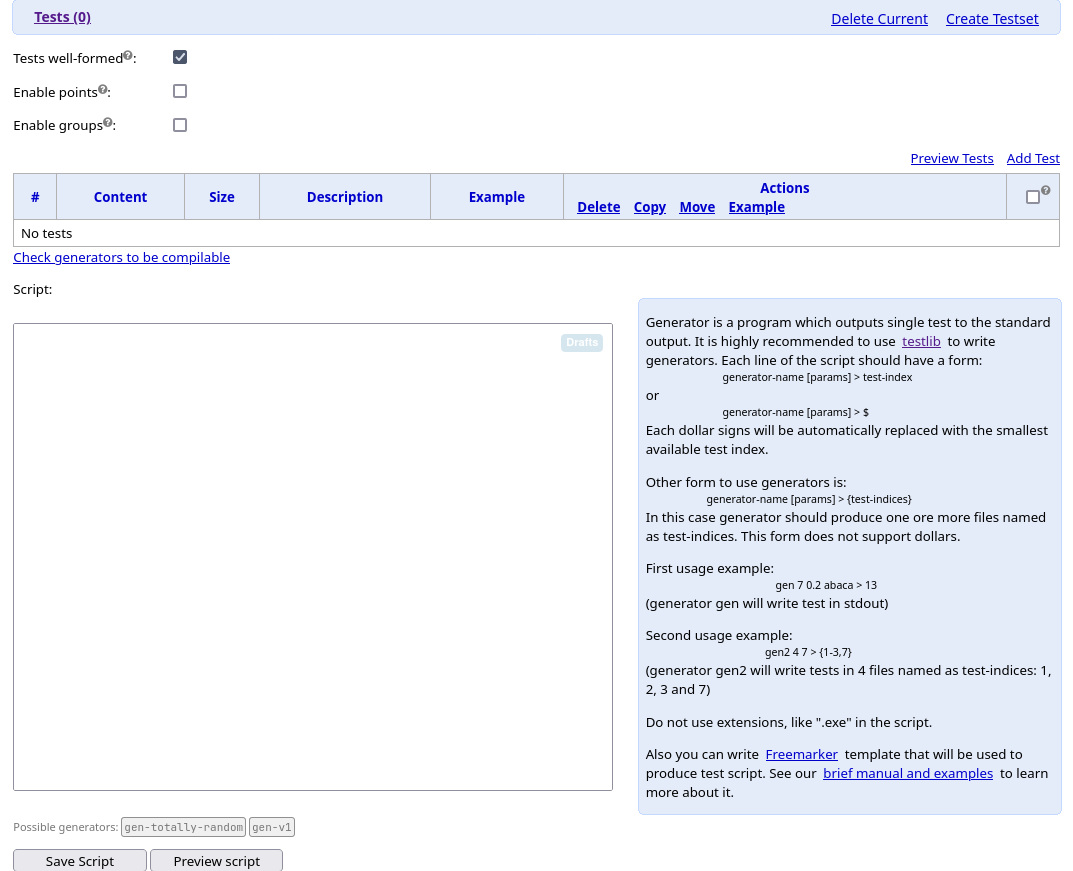
Similarly to the other pages, there is a table, and a button to add the tests. But in this page there are more elements than the other pages.
There are some checkboxes in the top of the page. The well-formed policy is what we have discussed in the test validation section. If checked, then Polygon will also automatically validate the tests according to this policy. If you click on the question mark near the Test well-formed text, there is a pop-up window appears, explaining the policy.
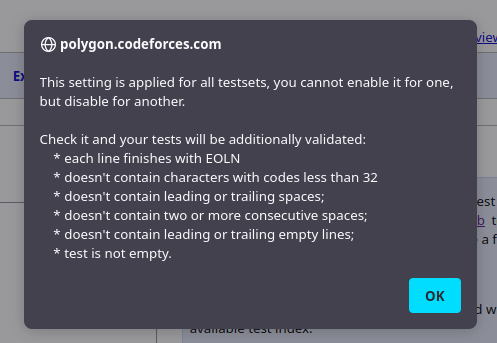
The other two checkboxes is for adding points and groups, and mainly used for other format like IOI, where there are subtasks and each subtasks has different scoring. Problem on Codeforces must be fully solved, so we don't need to check those checkboxes.
The huge part at the end is called script. This is a way to add the tests: by calling the generator. On the right of the input area box, there is a text, explaining how to write the script. This is what we have done before when calling the generator offline, and now on Polygon, we can compose them into a list of commands, which is actually called a script.
Clicking Add Test link above the table, a page will appear, providing us some other ways to add the tests. We will see it shortly.
The Preview Tests is for, you guess it, previewing the tests. We will see it later after generating the tests.
Adding the example tests
Now let's click the Add Test link. Here is the page looks like.

Above, there are options to add tests from an archive or files. This is suitable for existing contests with available tests, but it is not recommended when we already have the test generators. An archive or files will be very big, making them hard to maintain.
Notice that there is an option called type, which let's us to choose to add the test either manually or with a script again. Since we are adding the example test, we choose to add the test manually.
Remember that beside the original example, we also added a test case when writing the statement. Here will be our test input.
5
3
1 2 1
5
11 7 9 6 8
5
1 3 1 3 1
4
5 2 1 10
4
3 2 1 25
3
1 2 1
5
11 7 9 6 8
5
1 3 1 3 1
4
5 2 1 10
4
3 2 1 2Since this is the example test, we should click the check box Use in statements as well. After that the page should look like this.
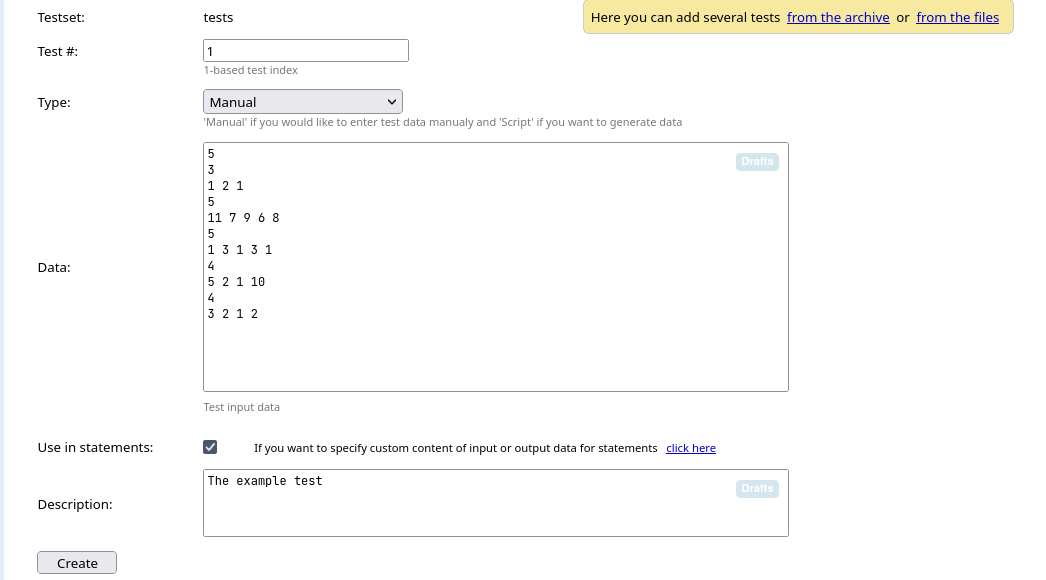
There is also an option for specifying custom output. This feature is useful for problem with non-unique outputs.
Click the Create button to add the example test. Now if you go to the Statement page again and see the statement, the example test will appear.
Writing the test generation script
Each command in the script on Polygon is similar to when we are executing the generator locally. The differences is the generator name, which we only specify its name, and the output file, denoted by the syntax > [id] where [id] is the test number, or > $ for automatically id generation.
A few first tests might be these.
gen-v1 -test-count 300 -sum-n 30000 -yes-count 150 -min-a 1 -max-a 10 -min-b 1 -max-b 10 > $
gen-v1 -test-count 300 -sum-n 30000 -yes-count 150 -min-a 1 -max-a 10 -min-b 100 -max-b 1000 > $
gen-v1 -test-count 300 -sum-n 30000 -yes-count 150 -min-a 100 -max-a 1000 -min-b 1 -max-b 10 > $
gen-v1 -test-count 300 -sum-n 30000 -yes-count 150 -min-a 100 -max-a 1000 -min-b 100 -max-b 1000 > $
gen-v1 -test-count 300 -sum-n 30000 -yes-count 150 -min-a 1 -max-a 10 -min-b 1 -max-b 10 > $
gen-v1 -test-count 300 -sum-n 30000 -yes-count 150 -min-a 1 -max-a 10 -min-b 100 -max-b 1000 > $
gen-v1 -test-count 300 -sum-n 30000 -yes-count 150 -min-a 100 -max-a 1000 -min-b 1 -max-b 10 > $
gen-v1 -test-count 300 -sum-n 30000 -yes-count 150 -min-a 100 -max-a 1000 -min-b 100 -max-b 1000 > $Here are 4 tests, the array length of the test cases in these tests is on average, with of the cases with the result YES, and the value size for the array and slightly varies.
We can of course, continue adding that. But that is not very elegant, since we must copy and paste a lot and change the test cases little by little. Fortunately, Polygon has a solution for that.
Introducing FreeMarker.
FreeMarker is the template engine used on Polygon, and in this case for generating the script for test generation. There is a brief manual about FreeMarker to the right of the script input box, and please do check it out first. FreeMarker is very powerful, and it can be used as a real programming language. This tutorial will demonstrate some of its power in writing the test generation script.
Making the lengths varies
This can be done by altering the test-count option. For that, we can use the <#list> tag, which is equivalent to a for loop.
<#assign testCount = 10000 >
<#list 1..5 as i>
gen-v1 -test-count ${testCount} -sum-n 30000 -yes-count 150 -min-a 1 -max-a 10 -min-b 1 -max-b 10 > $
gen-v1 -test-count ${testCount} -sum-n 30000 -yes-count 150 -min-a 1 -max-a 10 -min-b 100 -max-b 1000 > $
gen-v1 -test-count ${testCount} -sum-n 30000 -yes-count 150 -min-a 100 -max-a 1000 -min-b 1 -max-b 10 > $
gen-v1 -test-count ${testCount} -sum-n 30000 -yes-count 150 -min-a 100 -max-a 1000 -min-b 100 -max-b 1000 > $
<#assign testCount = testCount / 10>
</#list>
<#assign testCount = 10000 >
<#list 1..5 as i>
gen-v1 -test-count ${testCount} -sum-n 30000 -yes-count 150 -min-a 1 -max-a 10 -min-b 1 -max-b 10 > $
gen-v1 -test-count ${testCount} -sum-n 30000 -yes-count 150 -min-a 1 -max-a 10 -min-b 100 -max-b 1000 > $
gen-v1 -test-count ${testCount} -sum-n 30000 -yes-count 150 -min-a 100 -max-a 1000 -min-b 1 -max-b 10 > $
gen-v1 -test-count ${testCount} -sum-n 30000 -yes-count 150 -min-a 100 -max-a 1000 -min-b 100 -max-b 1000 > $
<#assign testCount = testCount / 10>
</#list>There is some problem with this: the yes-count is the same. One way to fix it is to replace 150 of yes-count with the expression ${testCount / 2}. But that expression will produce 0.5 for testCount == 1.
Another way to solve this problem is to use sequence which is equivalent to array/vector in a normal programming language. We will create a sequence of a pairs (testCount, yesCount). To simplify, we will create a 2D sequence instead. The script will then look like this.
<#assign testAndYesCounts = [
  [10000, 5000],
  [100, 50],
  [1, 0],
  [1, 1]
] >
<#list testAndYesCounts as testAndYesCount >
  <#assign testCount = testAndYesCount[0] >
  <#assign yesCount = testAndYesCount[1] >
  gen-v1 -test-count ${testCount} -sum-n 30000 -yes-count ${yesCount} -min-a 1 -max-a 10 -min-b 1 -max-b 10 > $
  gen-v1 -test-count ${testCount} -sum-n 30000 -yes-count ${yesCount} -min-a 1 -max-a 10 -min-b 100 -max-b 1000 > $
  gen-v1 -test-count ${testCount} -sum-n 30000 -yes-count ${yesCount} -min-a 100 -max-a 1000 -min-b 1 -max-b 10 > $
  gen-v1 -test-count ${testCount} -sum-n 30000 -yes-count ${yesCount} -min-a 100 -max-a 1000 -min-b 100 -max-b 1000 > $
</#list>
<#assign testAndYesCounts = [
[10000, 5000],
[100, 50],
[1, 0],
[1, 1]
] >
<#list testAndYesCounts as testAndYesCount >
<#assign testCount = testAndYesCount[0] >
<#assign yesCount = testAndYesCount[1] >
gen-v1 -test-count ${testCount} -sum-n 30000 -yes-count ${yesCount} -min-a 1 -max-a 10 -min-b 1 -max-b 10 > $
gen-v1 -test-count ${testCount} -sum-n 30000 -yes-count ${yesCount} -min-a 1 -max-a 10 -min-b 100 -max-b 1000 > $
gen-v1 -test-count ${testCount} -sum-n 30000 -yes-count ${yesCount} -min-a 100 -max-a 1000 -min-b 1 -max-b 10 > $
gen-v1 -test-count ${testCount} -sum-n 30000 -yes-count ${yesCount} -min-a 100 -max-a 1000 -min-b 100 -max-b 1000 > $
</#list>With this approach, we have more control over the test. Here we generated tests, as opposed to the previous method which generated tests.
Making the value range varies
We can as well use sequence of pairs to specifies the value ranges, and use loops to iterate over them.
<#assign testAndYesCounts = [
  [10000, 5000],
  [100, 50],
  [1, 0],
  [1, 1]
] >
<#assign valueRanges = [
  [1, 10],
  [100, 1000],
  [100000, 500000]
] >
<#list testAndYesCounts as testAndYesCount >
  <#assign testCount = testAndYesCount[0] >
  <#assign yesCount = testAndYesCount[1] >
  <#list valueRanges as aValueRange>
    <#list valueRanges as bValueRange>
      gen-v1 -test-count ${testCount} -sum-n 30000 -yes-count ${yesCount} -min-a ${aValueRange[0]} -max-a ${aValueRange[1]} -min-b ${bValueRange[0]} -max-b ${bValueRange[1]} > $
    </#list>
  </#list>
</#list>
<#assign testAndYesCounts = [
[10000, 5000],
[100, 50],
[1, 0],
[1, 1]
] >
<#assign valueRanges = [
[1, 10],
[100, 1000],
[100000, 500000]
] >
<#list testAndYesCounts as testAndYesCount >
<#assign testCount = testAndYesCount[0] >
<#assign yesCount = testAndYesCount[1] >
<#list valueRanges as aValueRange>
<#list valueRanges as bValueRange>
gen-v1 -test-count ${testCount} -sum-n 30000 -yes-count ${yesCount} -min-a ${aValueRange[0]} -max-a ${aValueRange[1]} -min-b ${bValueRange[0]} -max-b ${bValueRange[1]} > $
</#list>
</#list>
</#list>This script will produce tests. FreeMarker really helps us writing the script more easily. With just a little code, we can produce a large amount of tests!
Preview the tests
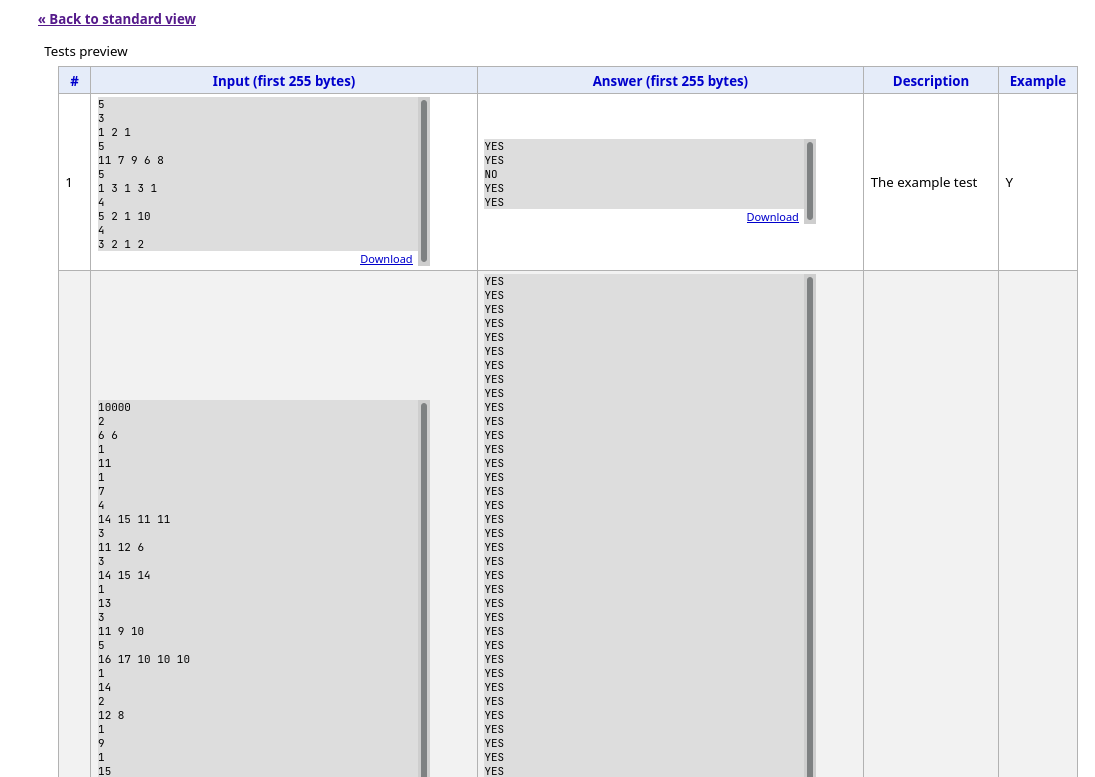
For each test, Polygon will show a few first character of the input, as well as the output. Seeing the whole test is a lot, but a few first line is enough for online reviewing. It also allows to download the tests to review it more thoroughly when necessary.
When there is some problem with a test, the message will also display there. For example, if you happened to add another range for the value range like [500000, 1000000] in the script, then there will be an error because 1000000 + 1000000 will exceed the maximum value of array.

It is a bit hard to see the error in a small box, so you can download the test to see it locally, or maybe run that command on your computer and do the validation locally.
Commit! Commit more! Commit forever!
The commit message can be Add a better generator with tests. But as always, it should be broken down, like when you add the generator and when you add the tests.
Final touches
We basically have done everything to prepare a problem, from writing the statement to generate the tests. If you look at the right panel again, there are sections that we have not touched yet. They are Package, Verification, Review problem and Show warnings.
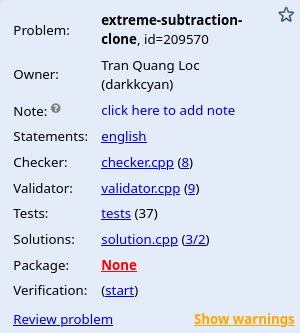
Show warnings
Remember about the warning when writing the validator? By clicking the link, we are directed to the page containing all the warnings. We have done a good job not to leave any warnings in the other section, but the section Show warning is still orange. That because there is a small thing that Polygon recommends us to do: add the tags to the problem.

To add the tags for the problem, we can go to the General info page.
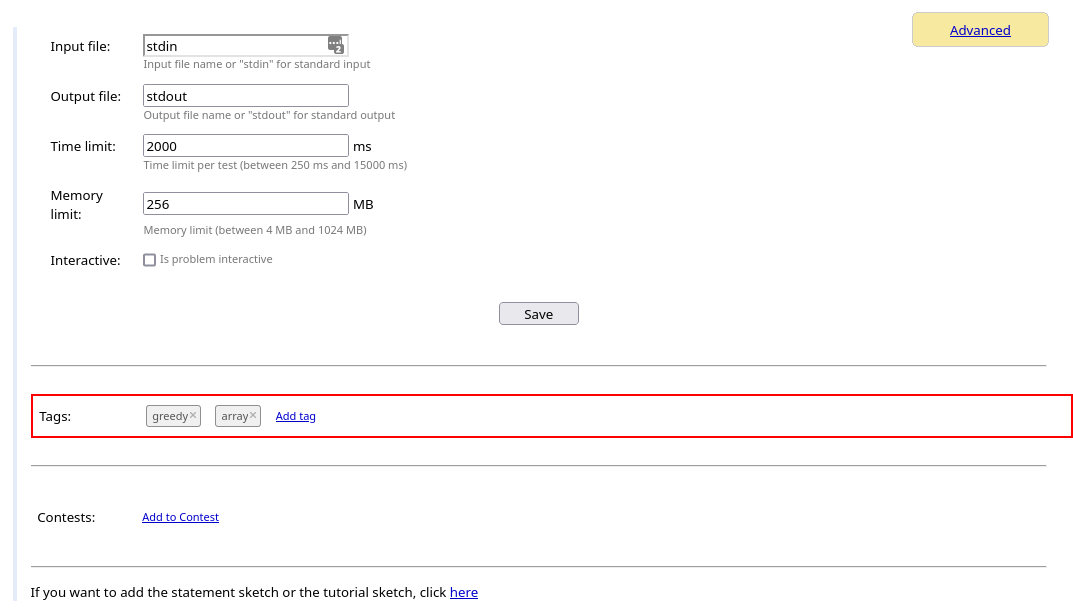
The tags doesn't seem to be useful, but one of their use on Polygon is for Searching. There is a Search option on the top bar in the home page (when you logged in).

After adding the tags, you can make a commit as well.
Review problem
By clicking the link in the section Review problem of the right panel, a page shows up with three columns: problem statement, validator and checker.
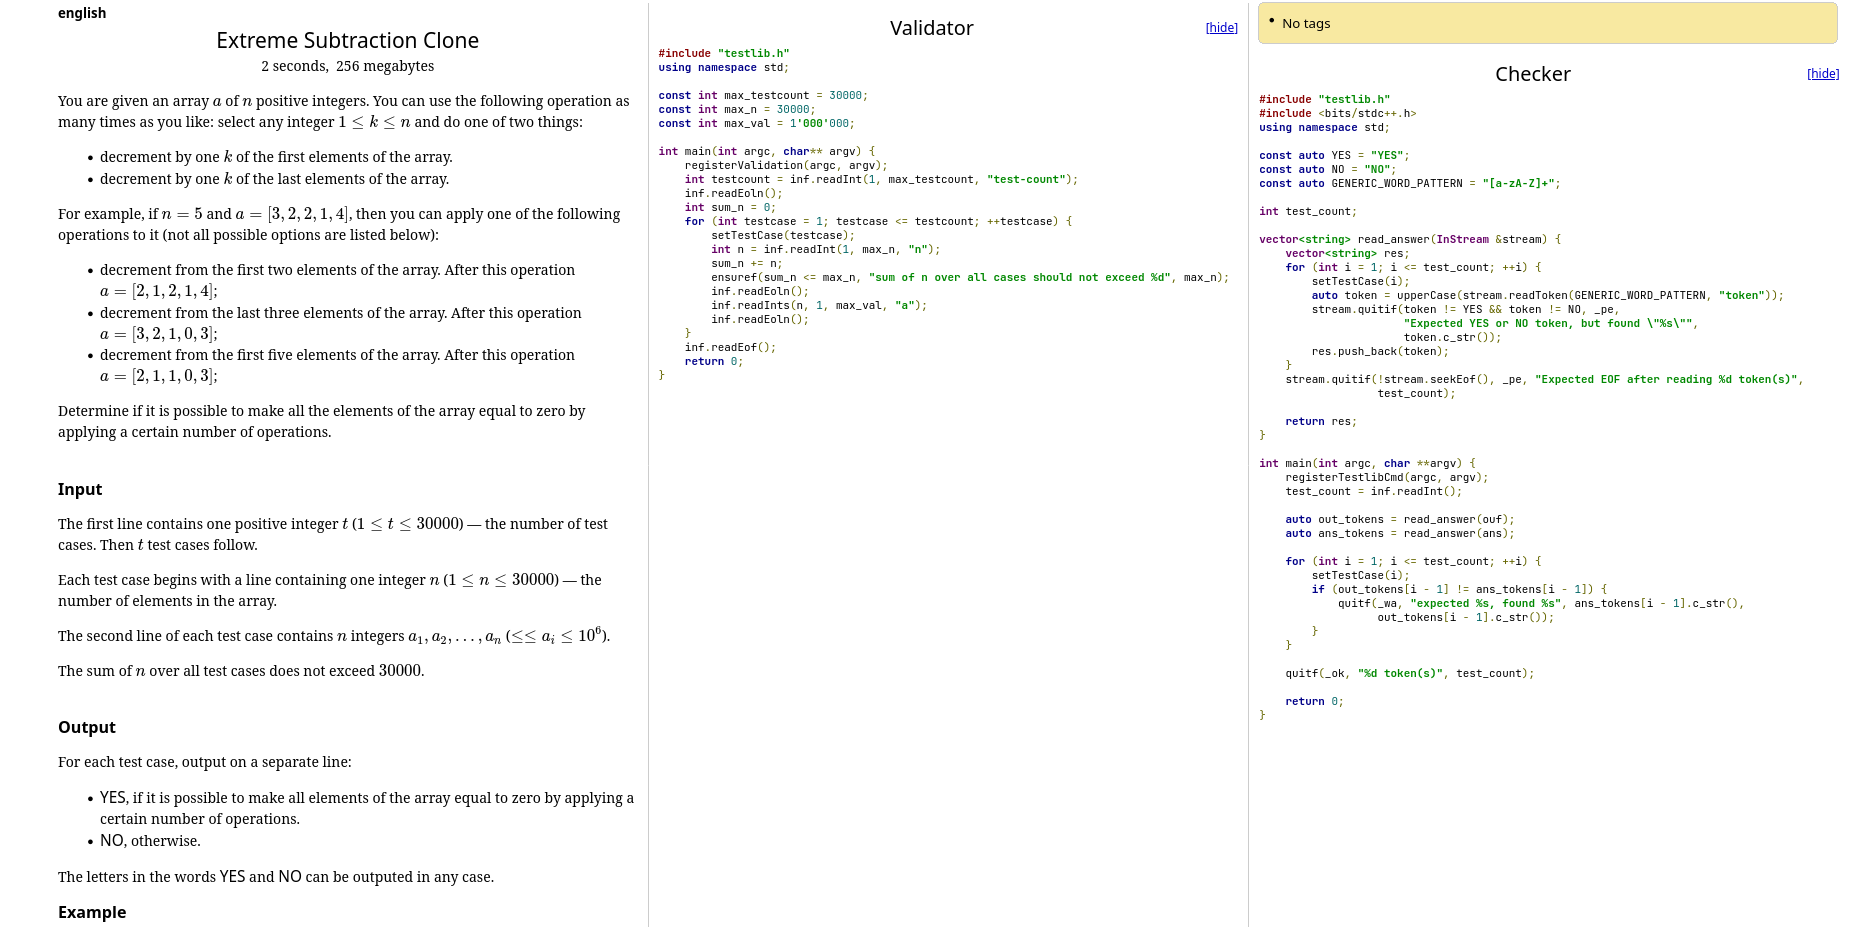
I purposely capture this image before adding the tags, to show that in this page, warnings also appear as well. There are only validator and checker besides the problem statement, because the validator and the checker must be aligned to the problem statement. The reviewer should check if the constraints for the input are correctly checked by the validator, as well as if the checker correctly checks the output.
Invocation
There is an option call Invocation on the top bar of the problem. When clicked, this page shows up.

This page is for running some/all solutions against the some/all tests. When clicking Want to run solutions?, two tables will appear, one for choosing solution, and one for choosing the tests. After choosing, click on Run judgement to run them.
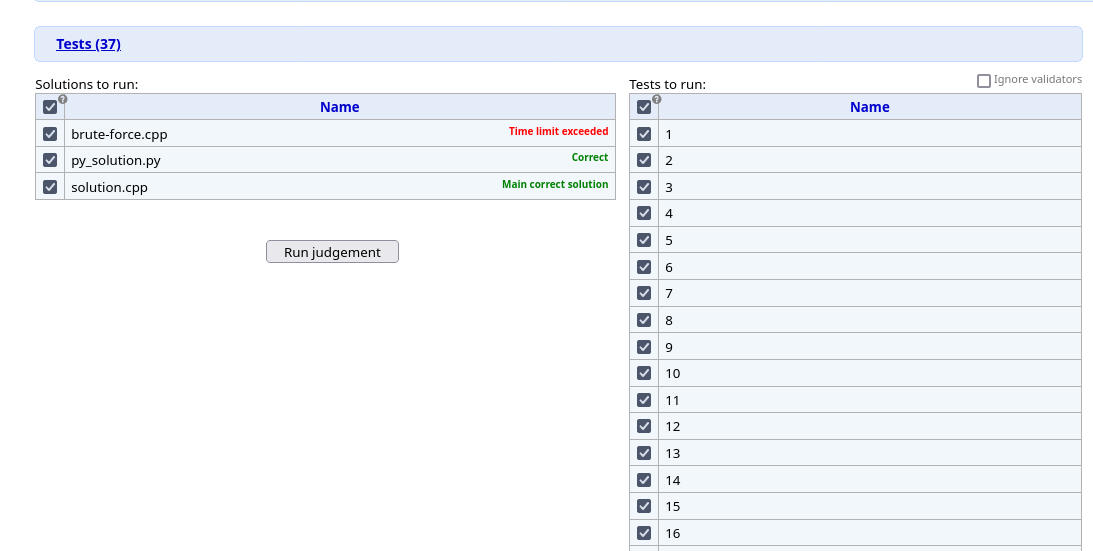
After that, there will be a new item on the table. Click the view link of the items to see the running result. The solutions are also ran on the fly, so you need to refresh the page to update the result.
The result table grows vertically with the number of tests, so it will be huge. There are some useful information at the end of the table though, like the number of passed tests, the resource usages for each solution. There are also scores if you use scoring.
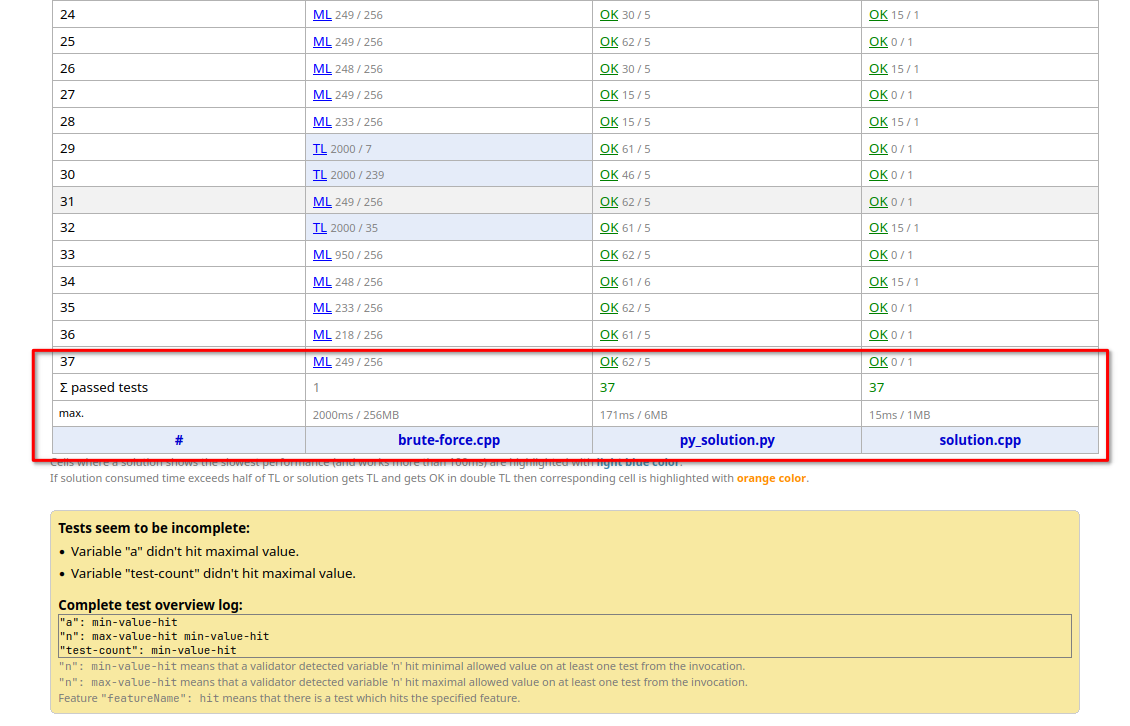
There are also notes about the color coding. Base on that you can adjust the
time and memory limit accordingly.
INFO
The invocation page is not shared among the authors of the problem.
Verification
If you click the (start) link of the Verify section in the right panel, it seems like nothing happen. But actually, Polygon will create a new invocation for all solutions and all tests, which can be seen in the Invocation page. And after that, Polygon will collect the invocation result and compare it to the solutions verdicts. If everything matches, then the verification is success. Otherwise it is failed, meaning something is wrong, and you should fix it.
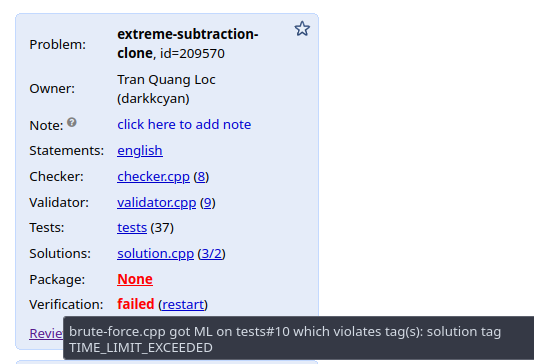
We got failed verdict, because while we mark the solution brute-force.cpp as TLE, it has MLE verdict for the -th test. To fix it, we should change the verdict of the brute-force solution into Time limit exeeced or Memory limit exceeded (or TLE or MLE). After fixing and re-run verification, we will get the OK result.
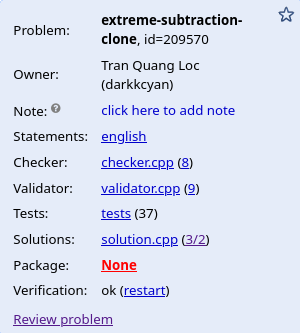
Package
A package is a zip file, containing all of the files of the problem, in the same directory as on Polygon. Codeforces in particular will use the package file to import the problem from Polygon, making it very easy to add problems to Codeforces.

These are the same old tables with an adding buttons. Beside the table for packages, recently there is also a table for the problem material. See here for more details.
As seen here, there are two type of packages. The standard package only includes all files of the problem, while the full package contains additional files, noticeably the generated tests. So the full package will be heavier but things are already done in the full package. The standard package, however, is enough, since everything are reproducible. The checker, validator, the solutions and generators are all in the package, and there even a script for running them. Codeforces only requires standard package to import the problem.
There is also a checkbox Verify. With this checked, Polygon will also do the verification process (again), and when failed, Polygon won't produce the package.
Also note that Polygon only create a package when there is currently no changes because it is for a version, not half version. Make sure to commit changes before creating a package. That being said, you can create any package for any version, whichever you like, and Polygon will store the package for you.

You can download the package and see it for yourselves.
Adding the problem to a Codeforces mashup
To create a Mashup on Codeforces, go to Gym > Mashup > Create new mashup.

There is a note about how to add the problem to Codeforces. We must grant the access of the problem to the user codeForces on Polygon.
On the top bar of the problem on Polygon, click Manage Acess. (And yes, there is a table with an adding button). Click Add users and type codeforces and then click Add users button.

The link to this problem on Polygon is on the second panel of the right column.
Click it to copy the link, and paste it to the mashup creation page. Click Create Mashup Contest to finally create the contest. That is, you finally added this problem to a Mashup contest on Codeforces! You can share this contest with your friends, or add it to a Codeforces group.
And Here is the invitation to the mashup, which is the result of this post.
Conclusion
There are more things that Polygon can do, and one of them is managing contests. But for problem preparation only, this post provides basic knowledges. I know that this post is very long, but I do hope that I have explained everything thoroughly. And I hope you can now make a problem by yourselves with Polygon!
This series is not ended here. You may notice that our test set is not really good for a real problem, because our generator is not strong. I will explain it why that is the case, and how can we improve it in the future parts. So please stay tuned!
Special thanks
I want to give special thanks to Nikolay KAN Kalinin for proofreading, as well as giving very wonderful comments and feedback! I think I could not go this far to make this blog post without him.
Shout out to MikeMirzayanov and the Codeforces team for making Polygon! There are still more and more features being added, even during the writing process of this post.
And thank you for reading this post!